You’ll need a precision screwdriver set, soldering iron, and multimeter to fix your drifting joystick caused by worn potentiometers. Start by powering off your controller completely and setting up a static-free workspace with proper tools. Carefully disassemble the controller, document each step with photos, then desolder the faulty joystick component. Install Helder’s Drift Fix PCB using proper soldering techniques at 350°C, reassemble systematically, and calibrate through your system’s settings. Continue below for detailed repair instructions.
Understanding VR Controller Joystick Drift Problems
Anyone who’s spent hours in VR knows the frustration of joystick drift—that annoying phenomenon where your controller’s analog sticks register movement even when you’re not touching them.
VR enthusiasts constantly battle joystick drift, where analog sticks phantom-register movement during crucial gaming moments.
This problem stems from worn potentiometers inside your analog sticks, which are the components responsible for detecting stick position and translating it into game inputs.
When these potentiometers degrade through normal use, they start sending false signals to your VR system. You’ll notice your character moving without input, or your camera view slowly drifting in one direction.
This issue affects all gaming platforms and seriously impacts your immersive VR experience, making precise movements nearly impossible.
Make sure you recognize these symptoms early, as temporary fixes rarely provide lasting solutions for this hardware-based problem.
Essential Tools and Materials for VR Controller Repair
Before you plunge into repairing your VR controller’s joystick drift, you’ll need to gather the right tools and materials to guarantee a successful fix.
Start with a precision screwdriver set containing Phillips and T9 security torx bits to access the controller’s internal screws. You’ll also need a soldering iron and solder for attaching the drift fix PCB to joystick pins.
Grab tweezers or a small pick tool to handle delicate components without causing damage during disassembly. A multimeter proves invaluable for testing potentiometer resistance to diagnose drift issues before repairs.
Finally, establish a clean workspace and wear an anti-static wrist strap to protect sensitive electronic components throughout the repair process.
Safety Precautions Before Disassembling Your VR Controller
Taking proper safety measures protects both you and your expensive VR controller from potential damage during the repair process.
First, power off your controller completely and disconnect it from all devices to prevent accidental inputs or electrical shorts. Set up a static-free workspace and wear an anti-static wrist strap to protect delicate electronic components from static electricity damage.
Always power down your VR controller and create a static-free workspace before beginning any repair work.
Before you begin, gather all necessary tools including precision screwdrivers and a soldering iron. You’ll save time and avoid frustration with everything ready.
Take photos of each disassembly step and label screws by location – this documentation prevents confusion during reassembly.
Watch for sharp edges and small components that might fall out unexpectedly, keeping your workspace organized to avoid losing critical parts.
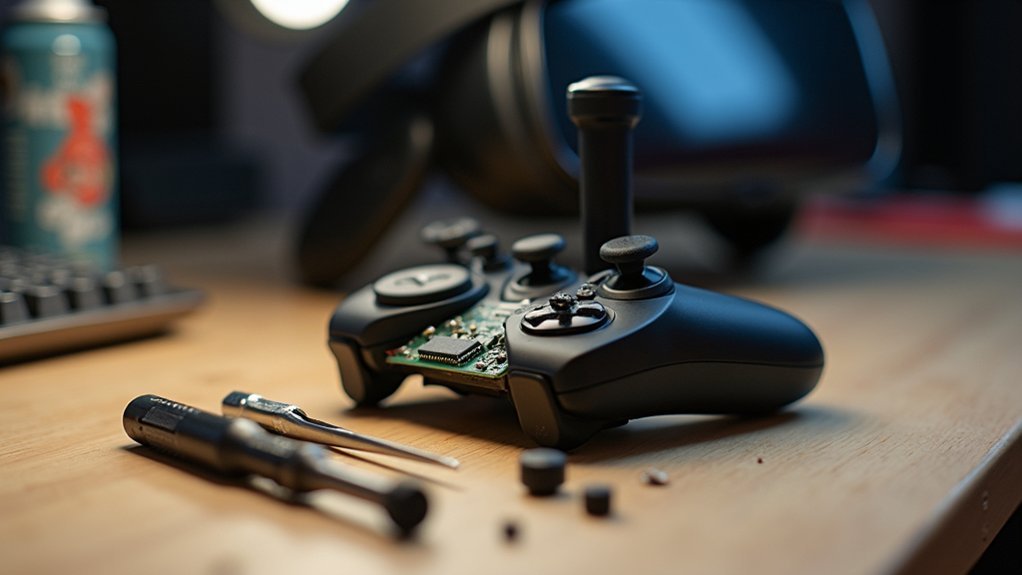
Step-by-Step VR Controller Disassembly Process
Identify your specific VR controller model first, since disassembly steps differ considerably between manufacturers like Oculus, HTC, and PlayStation.
Once you’ve confirmed your model, gather a small Phillips screwdriver and plastic opening tools.
Start by removing all visible screws at the controller’s base.
Check beneath grips and covers for hidden screws that manufacturers often place there. Store these screws in a small container so you don’t lose them.
Next, carefully insert your plastic opening tool at a corner or seam of the controller shell.
Gently pry apart the halves, working around the edges to release plastic clips without breaking them.
Before fully separating the shell, disconnect internal ribbon cables and battery connectors.
Document component placement with photos for easier reassembly later.
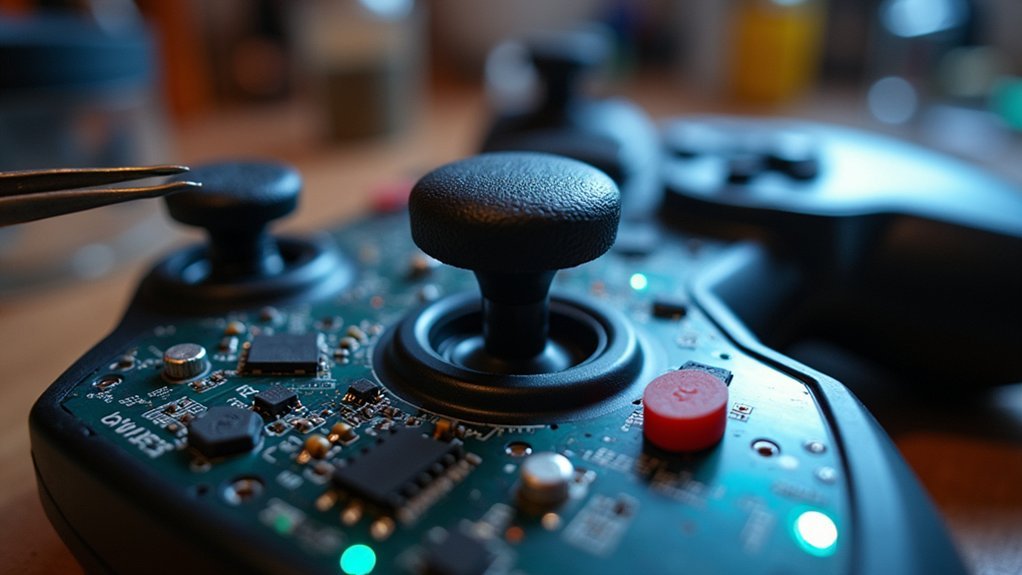
Removing the Faulty Joystick Component
Once you’ve accessed the internal components, locate the faulty joystick module that’s causing your drift issues.
You’ll need to disconnect the flex ribbon cable and battery first to create proper workspace around the joystick assembly. This prevents accidental damage and gives you better maneuverability during the removal process.
Now comes the essential step: desoldering the analog stick from the main circuit board.
The critical phase requires precise desoldering techniques to safely remove the problematic analog stick without damaging surrounding circuitry.
Heat each solder point carefully with your soldering iron, ensuring you’ve melted all connections completely. Don’t rush this process, as incomplete desoldering can damage the board.
Once all solder points are heated and loosened, gently lift the faulty joystick component straight out of the controller shell, preparing the area for your new drift fix PCB installation.
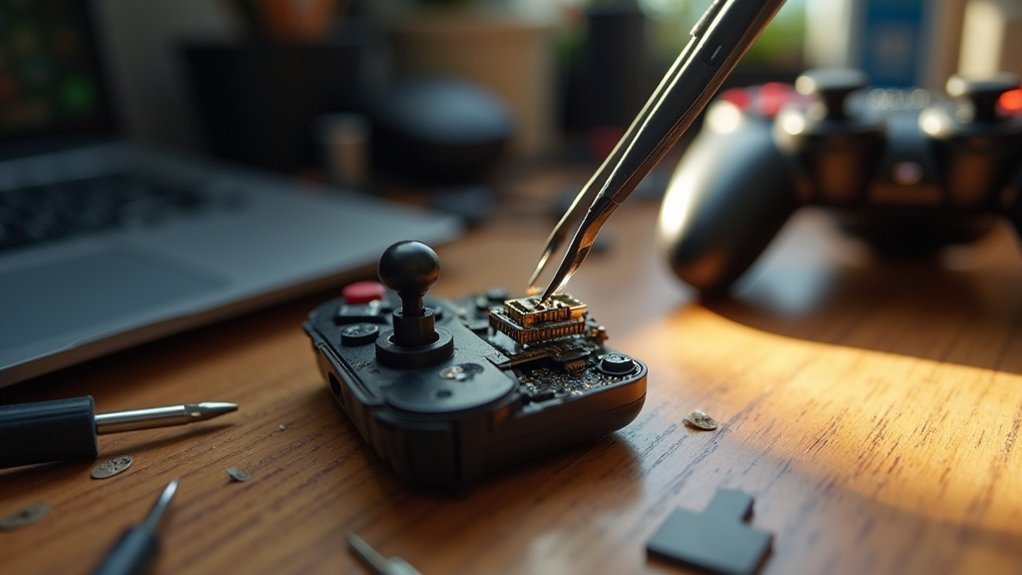
Installing Helder’s Analog Stick Drift Fix PCB
Position Helder’s Drift Fix PCB directly onto the exposed joystick pins where you removed the faulty component.
You’ll need to align the PCB carefully to guarantee all six solder points match up with the joystick pins underneath. Take your time with this positioning—accuracy here determines whether your fix will work properly.
Once aligned, solder each of the six connection points methodically. Use a steady hand and appropriate soldering technique to create solid connections without creating bridges between pins.
The PCB’s designed to address drift issues at the hardware level, so proper soldering is essential.
After completing all solder joints, inspect each connection for quality and consistency.
This drift fix PCB provides a cost-effective solution that’ll extend your controller’s lifespan considerably when installed correctly.
Soldering Techniques for VR Controller Repair
You’ll need specific tools like a fine-tip soldering iron, flux, and desoldering braid to tackle VR controller repairs effectively.
The installation process requires precise heat control and proper joint preparation to avoid damaging sensitive PCB components.
Master these heat control methods by practicing on scrap electronics before working on your actual controller’s analog stick connections.
Essential Soldering Tools
Before attempting any VR controller repairs, you’ll need to gather the right soldering tools to guarantee precise and safe work on these delicate electronic components.
Start with a soldering iron featuring a fine tip for precision work, paired with 60/40 tin-lead solder wire that creates strong electrical connections. You’ll also need soldering flux to improve solder flow and enhance joint strength.
A helping hand tool stabilizes circuit boards during repairs, improving accuracy while reducing component damage risks. Include desoldering braid or a desoldering pump for removing old solder when replacing faulty parts.
Don’t forget safety equipment like anti-static wrist straps to prevent electrostatic discharge damage to sensitive electronics.
These essential tools enable proper technique where you heat joints evenly, allowing solder to flow correctly for reliable, long-lasting repairs.
PCB Installation Steps
Six critical steps comprise the PCB installation process for VR controller joystick repair. You’ll need precision and patience throughout this delicate procedure.
| Step | Action | Key Point |
|---|---|---|
| 1 | Disassemble controller | Remove screws, battery, ribbon cables |
| 2 | Position drift fix PCB | Align six solder points perfectly |
| 3 | Solder connections | Use fine-tipped iron, avoid bridges |
| 4 | Verify connections | Check each solder point’s integrity |
| 5 | Reassemble components | Reconnect all parts before testing |
Start by carefully disassembling your controller, removing screws and components to access joystick pins. Position the drift fix flex PCB over the pins, ensuring perfect alignment of all six solder points. Use your fine-tipped soldering iron to create secure, clean connections without solder bridges. Double-check each connection’s integrity before reassembling. Finally, calibrate using a gamepad tester website.
Heat Control Methods
Temperature precision becomes your most critical ally when soldering the drift fix PCB to VR controller joystick pins. Set your temperature-controlled soldering iron to 350°C (662°F) for ideal heat management. You’ll prevent component damage while maintaining proper solder flow.
Apply flux to both the PCB and joystick pins before soldering. This improves electrical connections and minimizes cold joint risks. Hold your iron on each joint for only 2-3 seconds maximum—longer exposure overheats components and damages circuits.
Keep your iron tip clean and tinned before each use. This maintains tool longevity and improves results.
When mistakes happen, use desoldering braid or a solder sucker to remove excess material. Clean connections reduce short circuit chances and guarantee reliable repairs.
Reassembling Your VR Controller Properly
Once you’ve completed the joystick repair, reassembling your VR controller requires careful attention to detail to confirm everything functions properly.
Start by carefully aligning the controller’s shell halves, making sure all internal components like buttons and triggers are properly seated before pressing them together.
- Secure with screws systematically – Reinsert all screws in correct order, starting with hidden ones beneath grip covers or battery compartments.
- Verify all connections – Double-check that flex ribbon cables and connectors are reattached and seated firmly.
- Test before final tightening – Check button and analog stick functionality before fully securing all screws.
- Complete exterior assembly – Confirm covers and grips snap back into place properly.
This methodical approach prevents connection issues and confirms your repaired controller operates flawlessly.
Calibrating VR Controller Joysticks After Installation
After reassembling your VR controller, you’ll need to calibrate the joysticks to make sure they respond accurately to your movements. Connect your controller to a PC or Mac using a USB cable and navigate to a gamepad tester website.
Position both analog sticks in their default center position before starting calibration – this guarantees accurate baseline readings.
Focus on adjusting the horizontal potentiometer to properly center the left analog stick, which eliminates drift issues. Follow the on-screen calibration prompts carefully, testing each joystick movement to confirm the controller detects inputs without registering false movements.
Only reassemble the controller shell after you’ve successfully completed calibration and verified all components function correctly. This final step prevents having to disassemble everything again.
Testing VR Controller Performance and Troubleshooting
After installing your VR controller joysticks, you’ll need to test their performance to guarantee they’re working correctly.
Start by using drift detection methods to identify any unwanted movement in your analog sticks, then employ calibration tools to verify proper tracking accuracy.
These testing procedures will help you catch potential issues early and confirm your repair was successful.
VR Drift Detection Methods
Precision becomes critical when detecting drift in VR controllers, as even minor joystick movement can greatly impact your immersive experience.
You’ll need systematic methods to identify and address drift issues effectively.
Start by holding your VR controller completely still and watching for any unintended cursor or object movement on screen. This simple test reveals drift immediately.
- Use gamepad testing software to visualize analog stick positions in real-time
- Access your VR system’s built-in calibration tools to adjust sensitivity and dead zones
- Update controller firmware regularly to fix software bugs causing drift
- Maintain clean tracking sensors and remove environmental obstructions
These detection methods help you pinpoint drift sources quickly.
Once you’ve identified the problem, you can proceed with targeted fixes rather than guessing at solutions.
Calibration Tools and Testing
Once you’ve detected potential drift issues, you’ll need reliable calibration tools to accurately assess and fix your VR controller’s performance. Gamepad tester websites provide visual monitoring of analog stick positions, ensuring inputs register accurately. Before testing, center your analog sticks in their default positions for precise readings.
| Tool Type | Effectiveness |
|---|---|
| Online Gamepad Testers | Instant visual feedback |
| Software Calibration | Professional-grade accuracy |
| Built-in OS Tools | Convenient and accessible |
| Hardware Testing Rigs | Ultimate precision control |
| Mobile Apps | Portable troubleshooting |
Regular testing after repairs catches emerging issues early, preventing frustrating gameplay interruptions. Calibration tools extend your controller’s lifespan by ensuring correct function and reducing wear from incorrect inputs. You’ll maintain smoother gaming experiences through consistent monitoring and adjustments.
Frequently Asked Questions
How to Quickly Fix Stick Drift?
You’ll need Helder’s analog stick drift fix kit for $15. Disassemble your controller, remove existing components, solder the new PCB onto joystick pins, then calibrate using a gamepad tester website.
Does Rubbing Alcohol Fix Stick Drift?
Rubbing alcohol can temporarily fix stick drift by cleaning dirt and debris from your joystick’s components. You’ll likely see short-term improvement, but it won’t permanently solve underlying hardware issues like worn potentiometers.
How Do I Fix My Controller Joystick?
You can fix your controller joystick by using Helder’s Analog Stick Drift Fix Kit. It requires basic soldering skills to install the PCB, then you’ll calibrate using a gamepad tester website.
Can You Use Wd40 on a Controller Joystick?
You shouldn’t use WD-40 on controller joysticks. It’ll leave residue attracting dirt, break down internal components, and potentially damage electronics. Instead, use specialized contact cleaners or electronics-safe lubricants for proper maintenance.
In Summary
You’ve successfully repaired your VR controller’s joystick drift and restored precise movement control. Your patience with the disassembly, careful soldering, and proper reassembly has paid off. Don’t forget to run calibration tests and check all buttons before jumping back into your favorite VR games. If you’re still experiencing issues, double-check your solder connections and verify all ribbon cables are properly seated. You’ve saved money and gained valuable repair skills.


Leave a Reply