You’ll need to position your dual lenses at 6.5-7 inches apart for ideal depth perception while maintaining camera height between 62-66 inches. Keep both lenses perfectly synchronized with identical exposure settings and clean them regularly with microfiber cloths. Use professional stabilization systems and avoid rapid movements that cause viewer nausea. Place ambisonic microphones near your camera and limit crew visibility during shoots. Record at consistent resolutions and organize your files systematically. These fundamentals will transform your stereoscopic projects into truly enthralling experiences.
Understanding Spatial Depth and Camera Positioning
Mastering spatial depth forms the foundation of compelling 3D 360-degree stereoscopic filming.
You’ll need to position your dual lenses at an interaxial distance of 6.5 to 7 inches, mimicking natural human eye spacing for ideal depth perception.
Place your camera at eye level, approximately 62 to 66 inches from the ground, to maintain realistic viewing perspectives that enhance immersion.
When filming close-up subjects, adjust the interaxial distance to prevent viewer discomfort or nausea.
Your synchronized dual lens setup captures both horizontal and vertical depth effectively.
Don’t forget to integrate spatial audio recording alongside your lighting techniques to create a fully immersive experience.
Test your footage regularly in VR headsets during production to assess spatial depth quality and verify your camera positioning meets comfort standards.
Equipment Selection for Stereoscopic Capture
You’ll need to carefully configure your camera rig with dual-lens systems that maintain the proper interaxial distance of 6.5 to 7.5 cm to replicate natural human vision.
Your lens quality directly impacts the final stereoscopic output, so invest in high-grade options like the Canon RF 5.2mm f/2.8 L Dual Fisheye Lens designed specifically for immersive capture.
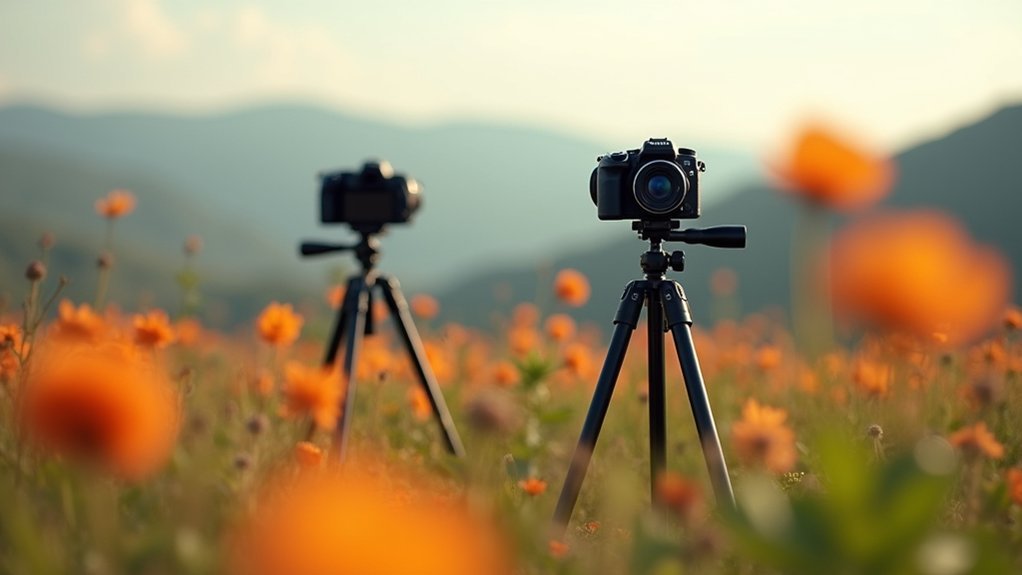
Don’t overlook stabilization requirements—gimbals and robust tripod systems aren’t optional when you’re creating content that viewers will experience in full 360-degree stereo.
Camera Rig Configuration
The foundation of successful 3D filming lies in selecting and configuring the right camera rig for stereoscopic capture. Your setup directly impacts the viewer’s immersive experience, so precision matters.
- Position your lenses 6.5 cm apart to match average human interpupillary distance. This spacing creates natural depth perception that won’t strain viewers’ eyes or feel artificial.
- Use a specialized dual-lens camera system like the Canon RF 5.2mm f/2.8 L Dual Fisheye Lens with compatible VR body. These systems guarantee proper synchronization between left and right captures.
- Calibrate identical exposure settings across both lenses to prevent brightness and color mismatches. Different lighting conditions can disrupt the 3D effect if not properly balanced.
Mount everything on a sturdy tripod for stability.
Clean your lenses regularly to maintain stereoscopic quality.
Lens Quality Standards
While camera positioning sets your foundation, lens quality determines whether your 3D footage captivates or disappoints viewers.
You’ll need high-quality dual fisheye lenses like the RF 5.2mm f/2.8 L Dual Fisheye Lens for stereoscopic capture. These lens quality standards guarantee minimal distortion and maximum resolution, maintaining fidelity that’s vital for immersive experiences.
You must prioritize consistent color reproduction between lenses to prevent stereoscopic mismatches that cause eye strain. Choose lenses with lower f-stop values for superior low-light performance, especially when working with varied lighting equipment setups.
Don’t overlook maintenance—regularly clean your lenses since dust or smudges dramatically impact 3D image quality.
Any clarity issues compromise depth perception, turning your carefully planned shoots into viewer disappointments.
Stabilization System Requirements
Pristine lenses mean nothing if your stabilization system can’t deliver smooth, shake-free footage that keeps viewers comfortable throughout their 3D experience.
Camera shake in stereoscopic 360-degree filming causes disorientation and fatigue, making your content unwatchable.
Your steady camera setup requires careful consideration of these essential factors:
- Weight distribution – Heavy or unbalanced systems create instability and operator fatigue during extended shoots.
- Environmental adaptability – Test your stabilization system in various conditions, including wind and movement scenarios.
- Equipment compatibility – Choose tripods or specialized 360-degree gimbals specifically designed for stereoscopic cameras.
Invest in professional-grade stabilization that maintains consistent framing while effectively mitigating movement.
Your stabilization system directly impacts viewer comfort and immersion quality, so don’t compromise on this critical component of your 3D filming setup.
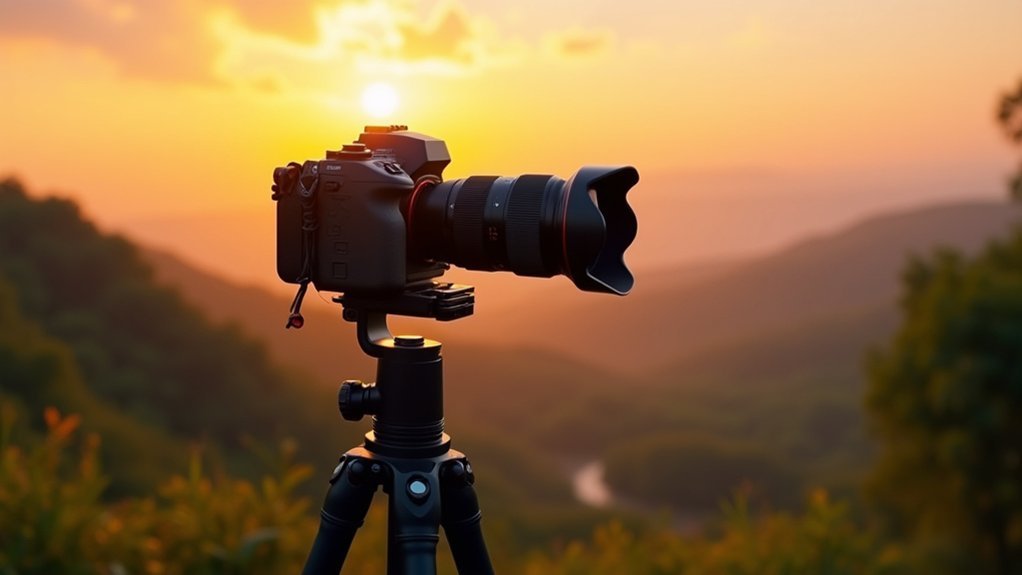
Optimizing Lighting for Immersive Quality
Lighting serves as the foundation of compelling 3D 360-degree content, directly impacting how viewers perceive depth and immersion.
You’ll achieve the best results by utilizing natural light whenever possible, as it creates a more cinematic atmosphere that enhances your immersive media production.
Maintain even lighting across your scene to minimize distracting shadows and highlights that disrupt the viewing experience. Capture footage during golden hours—early morning or late afternoon—when sunlight’s softer and more diffused, producing visually pleasing imagery.
Avoid abrupt lighting changes that cause viewer disorientation when shifting between different conditions. Experiment with setups that enhance depth perception, such as backlighting or fill lights to create dimensionality.
These techniques greatly improve the stereoscopic effect, making your content more engaging and comfortable for viewers.
Minimizing Stitch Lines Through Strategic Framing

You’ll achieve professional-looking 3D footage by implementing strategic camera positioning methods that work with your environment’s natural lines.
Mastering ideal lighting techniques guarantees consistent illumination across your entire scene, preventing jarring shifts between camera feeds.
When these capture methods fall short, post-production stitch correction becomes your final tool for creating seamless immersive content.
Strategic Camera Positioning Methods
Strategic camera positioning forms the foundation of professional 3D filming, directly impacting how seamlessly your final footage appears to viewers. Proper placement eliminates distracting visual interruptions and creates immersive experiences that keep your camera steady throughout production.
- Position at eye level height – Mount your cameras between 62 to 66 inches to maintain natural perspective and enhance viewer immersion, making scenes feel realistic rather than artificial.
- Utilize environmental lines – Leverage existing walls, pathways, and architectural features to naturally hide stitch lines, creating smoother shifts between camera views.
- Capture clean plates – Record empty background shots from identical angles and heights as your main footage, providing essential reference material for post-production stitch line removal and visual continuity enhancement.
Optimal Lighting Techniques
Three fundamental lighting principles can make or break your 3D footage quality, with proper illumination serving as your most powerful tool for minimizing stitch lines.
First, you’ll want to utilize even, natural lighting that reduces harsh shadows across seam areas. These shadows create distracting contrasts that highlight stitching artifacts in your final output.
Second, favor bright filming environments while avoiding low-light scenarios. Uneven exposure leads to noticeable stitching problems that’ll plague your footage. Position your camera at eye level to maintain consistent lighting across all lenses.
Third, capture footage during diffused sunlight periods like early morning or late afternoon. These ideal lighting techniques provide balanced illumination that greatly reduces stitch line visibility, ensuring seamless changes between camera perspectives.
Post-Production Stitch Correction
When you’re dealing with post-production stitch correction, smart framing decisions during filming can save you countless hours of editing headaches.
Strategic positioning of your subjects away from potential stitch lines dramatically reduces visible seams in your final 360-degree footage.
Here’s how to minimize post production issues:
- Frame subjects strategically – Position main focal points away from stitching areas where cameras overlap, guaranteeing your viewer’s attention stays on seamless content.
- Leverage natural environment lines – Use walls, pathways, and architectural elements to disguise shifts between camera feeds and guide viewers’ eyes away from potential discontinuities.
- Maintain consistent lighting – Confirm even exposure across all stitching points, as lighting variations will accentuate stitch lines and create jarring visual breaks in your immersive experience.
Camera Movement Techniques for Viewer Comfort
Camera movement in 3D filming directly impacts your viewers’ physical comfort and overall experience. When your camera records 360-degree footage, keep in mind that steady movements prevent motion sickness and discomfort.
Avoid rapid acceleration or abrupt changes that can nauseate viewers. Instead, maintain smooth linear motion throughout your shots. Minimize rotational movements and excessive panning, which commonly trigger nausea.
Use the “blink” method during edits to shift smoothly between scenes. Position your camera consistently between 62 to 66 inches high, ideally at your main character’s chin level for best immersion.
Capture longer takes without cuts, allowing viewers time to acclimate to movement patterns. Always utilize stabilization tools to guarantee your footage remains smooth and stable, as shaky shots considerably detract from viewer engagement.
Audio Recording With Spatial Sound Considerations
Audio quality in 3D filming requires specialized recording techniques that match your visual content’s immersive nature.
Audio quality in 3D filming demands specialized recording techniques that perfectly complement your immersive visual storytelling.
You’ll need to capture sound that complements your stereoscopic visuals and enhances viewer immersion.
Essential spatial audio recording techniques:
- Position ambisonic microphones close to your camera – This placement captures spatial audio that mirrors natural sound perception, creating an authentic 360-degree audio environment that matches your visual field.
- Record thorough room tone – Capture at least one minute of ambient background sound to maintain consistency during post-production and guarantee seamless audio shifts throughout your footage.
- Use targeted mono recordings – Employ shotgun mics or lavalier microphones for clear dialogue capture while minimizing unwanted background interference.
Remember to slate each shot with verbal cues and claps for efficient audio syncing.
Strategic sound placement guides viewer attention within your immersive environment.
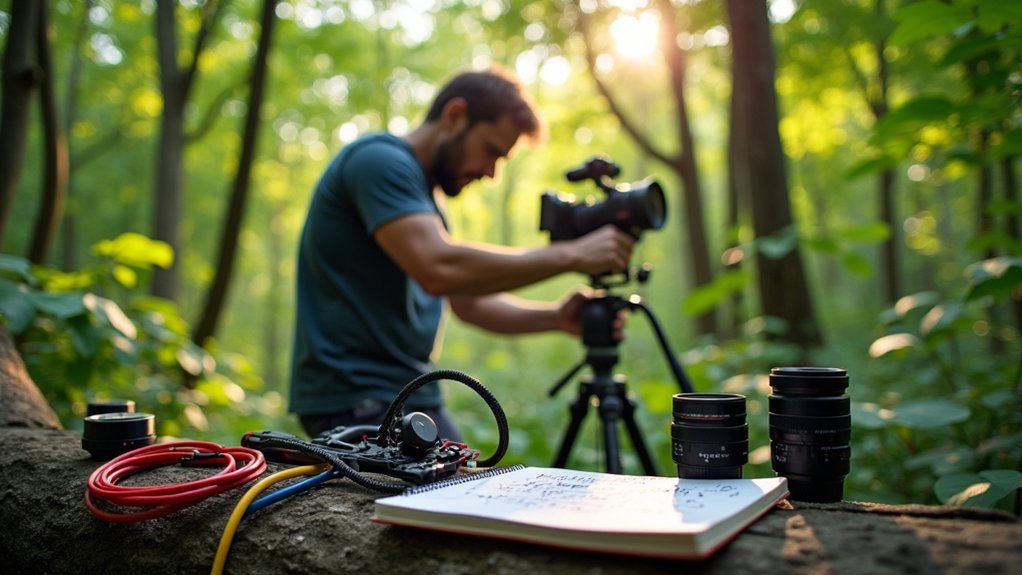
Managing Crew Visibility and Scene Blocking
Since 3D 360-degree filming captures everything around your camera, you’ll face unique challenges managing crew placement and actor movement within the immersive environment.
You’ll need to limit crew presence near the camera to essential personnel only, preventing distractions that break viewer immersion. Use remote monitoring systems so crew members can view footage while staying out of frame and maintaining effective communication.
Identify safe spots where crew can stand without obstructing viewer sightlines. Your scene blocking requires careful planning that considers character movement and positioning to guide viewer attention throughout the 360-degree space.
Regular rehearsals with actors and crew guarantee smooth execution, preventing accidental interruptions that could detract from the immersive experience you’re creating.
Lens Maintenance and Image Clarity
You’ll need to clean your camera lenses before every shoot since smudged glass creates unusable footage that’ll ruin your 3D project.
Don’t forget to inspect your equipment regularly throughout filming – dust and fingerprints accumulate quickly and destroy image clarity.
Prevent glare and distortion by calibrating your lenses for current lighting conditions, as these issues become magnified in 3D viewing experiences.
Clean Lens Before Shooting
While many filmmakers focus on camera settings and composition, maintaining pristine lens clarity stands as one of the most fundamental yet overlooked aspects of successful 3D stereoscopic filming.
You’ll discover that even minor smudges can compromise your footage quality and create extensive headaches in editing software later.
Here’s your essential clean lens maintenance routine:
- Pre-shoot preparation: Always use a microfiber cloth to clean your lens before each take, removing any fingerprints or debris that could affect image sharpness.
- Regular inspections: Check your lens throughout filming to verify it remains free of dust or obstructions that compromise clarity.
- Professional cleaning kit: Keep compressed air and lens cleaner readily available to maintain peak conditions during shoots and minimize post-production corrections.
Prevent Smudges and Glare
Building on proper lens cleaning techniques, preventing smudges and glare requires proactive measures that go beyond basic maintenance. You’ll need to establish consistent habits throughout your filming process. Keep your lens cloth readily accessible and check your lenses regularly during shoots. Dust, fingerprints, and environmental debris can accumulate quickly, causing unwanted glare and distortions.
| Prevention Strategy | Impact on Quality |
|---|---|
| Regular lens checks | Eliminates unexpected glare |
| Proper handling techniques | Prevents accidental smudges |
| Protected transport methods | Avoids scratches and damage |
| Environmental awareness | Reduces dust accumulation |
| Consistent lens maintenance | Guarantees peak footage clarity |
Maintain your cleaning kit with compressed air, lint-free wipes, and lens cleaning solution. These proactive steps minimize post-production challenges and assure professional-quality results.
Regular Equipment Inspection
Since 3D filming demands exceptional image precision, establishing a systematic equipment inspection routine becomes your foundation for consistent results.
You’ll need to pay special attention to lens cleanliness throughout your entire production process, as even microscopic imperfections dramatically impact stereoscopic image quality.
Your inspection routine should include:
- Pre-shoot lens examination – Check all camera lenses for dust, smudges, or scratches using proper lighting conditions.
- Mid-shoot maintenance checks – Monitor lens cleanliness frequently as environmental factors introduce contaminants during filming.
- Calibration verification – Confirm all lenses match focus and exposure settings to prevent visual inconsistencies between stereoscopic pairs.
Maintain a thorough cleaning kit with compressed air, lint-free wipes, and specialized lens cleaner.
Use optical-grade lens cloths exclusively to prevent scratches while removing debris that causes unwanted glare or distortion.
Recording Resolution and Technical Settings
Most 3D filming projects fail because creators underestimate the technical precision required for professional results. Your recording resolution directly impacts viewer experience—you’ll need minimum 4K per eye to prevent pixelation in VR headsets.
Set your frame rate to at least 30 fps for smooth playback, though you should use 60 fps for fast-moving scenes to eliminate motion blur. Configure your bitrate to minimum 50 Mbps for peak quality. Higher bitrates produce clearer images but demand more storage space.
Calibrate camera settings for uniform exposure and white balance across all lenses—this prevents color mismatches during post-production. Maintain 6.5 cm interaxial distance between lenses for natural depth perception, adjusting based on your scene’s specific depth requirements.
Post-Production Planning for Seamless Editing
Perfect technical settings mean nothing if your post-production workflow falls apart.
You’ll waste countless hours struggling with mismatched video formats and disorganized files if you don’t plan ahead.
Make sure you establish these three critical foundations before you start editing:
- Capture consistency – Record everything at identical resolution and frame rates to prevent jarring changes and technical headaches during the editing process.
- Systematic organization – Structure your clips and audio files methodically in your editing software, creating clear folders and naming conventions for instant access.
- Preparation for enhancement – Shoot clean plates without equipment visible, and plan your color correction pipeline to achieve cohesive visuals that maintain immersion throughout your 360-degree experience.
Frequently Asked Questions
How to Shoot Stereoscopic 3D?
You’ll need dual cameras spaced 6.5cm apart, matching human eye distance. Guarantee proper convergence on your subject, maintain even lighting to avoid distracting shadows, and test footage in VR headsets for comfort.
How to Shoot a 360-Degree Video?
Position your 360-degree camera at eye level on a stable tripod. Scout locations for ideal lighting conditions. Use ambisonic microphones for spatial audio. Test all equipment beforehand and do trial runs to avoid technical issues.
What Is the Difference Between Stereoscopic and Monoscopic 360 Video?
You’ll see depth and dimension with stereoscopic 360 video since it uses two cameras for each eye, while monoscopic shows the same flat image to both eyes without depth perception.
How to Shoot Immersive Content?
You’ll want to position your dual-lens 360 camera at eye level, use ambient lighting to avoid harsh shadows, capture spatial audio with ambisonic microphones, and carefully plan actor blocking to guide viewer attention effectively.


Leave a Reply