To find your VR headset’s perfect lens position, start by measuring your interpupillary distance (IPD), which typically ranges from 54-72mm. Locate your headset’s IPD adjustment controls near the lenses—these could be physical dials, sliders, or digital menu settings. Position the headset so the optical axis aligns with your pupils, then adjust the lens distance using depth controls. Fine-tune the angle to eliminate chromatic aberration and visual distortion. Proper positioning transforms blurry experiences into immersive adventures with ideal clarity awaiting your discovery.
Understanding Interpupillary Distance and Its Impact on Visual Clarity

When you put on a VR headset, the distance between your pupils directly determines whether you’ll see sharp, clear images or blurry, doubled visuals that strain your eyes.
Your interpupillary distance (IPD) typically falls between 54mm and 72mm, with most adults averaging around 64mm. When your headset’s lenses don’t align with your unique IPD measurement, you’ll experience double vision and uncomfortable eye strain that ruins your VR experience.
Misaligned VR lenses create double vision and eye strain when your headset doesn’t match your unique interpupillary distance measurement.
Proper IPD adjustment guarantees each eye receives the correct visual information, creating that immersive clear image you’re seeking.
Without this alignment, your brain struggles to merge the separate images from each lens, causing fatigue and reducing visual quality.
Getting your IPD right transforms your VR sessions from uncomfortable experiences into crystal-clear adventures.
Locating and Adjusting Your Headset’s IPD Settings
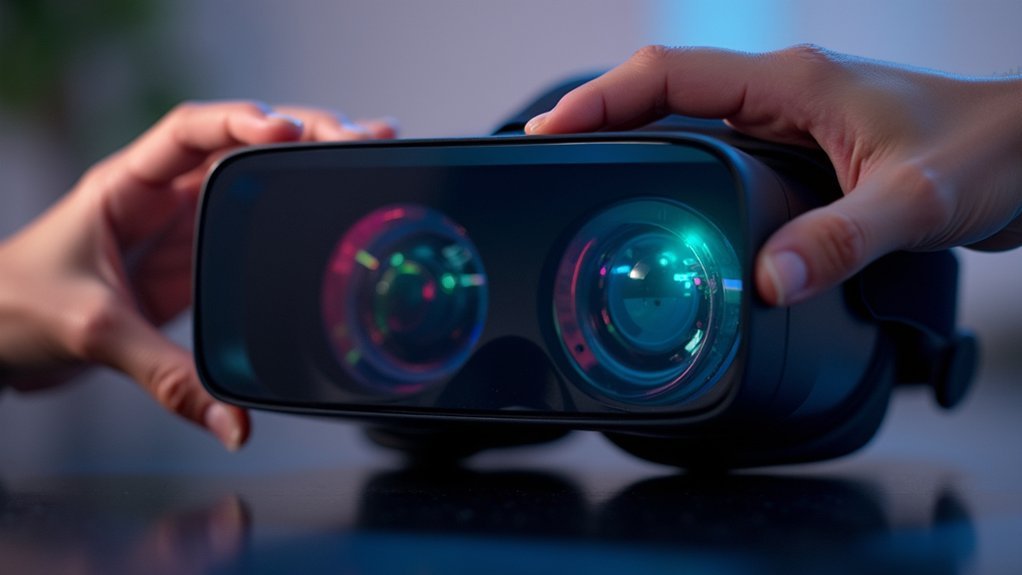
You’ll find the IPD adjustment controls on most VR headsets located near the lenses, typically as a physical dial, slider, or digital setting accessible through the headset’s menu system.
Start by putting on your headset and slowly adjusting the IPD mechanism while looking at text or detailed objects in VR until both eyes see a single, sharp image without strain.
Fine-tune the setting by making small adjustments and testing different content to guarantee you’ve achieved peak clarity across your entire field of view.
Finding IPD Controls
Where exactly can you locate the IPD controls on your VR headset? You’ll typically find these controls positioned near the bottom left side of your device, designed for convenient access during initial setup.
The IPD adjustment mechanisms vary depending on your headset model – some feature physical knobs or dials that you can turn manually, while others utilize digital settings accessible through the headset’s software interface.
Understanding your interpupillary distance is essential for getting your headset properly configured. Most people have an IPD between 54mm to 72mm, with 64mm being average.
To achieve a comfortable fit, you’ll need to fine-tune these settings by testing different positions until you discover the sweet spot where images appear sharp and focused, preventing eye strain and double vision.
Testing Clear Vision
Once you’ve located your headset’s IPD controls, testing for clear vision becomes your next priority.
Start with your headset’s default position, then make small incremental adjustments while wearing the device. As you adjust the IPD, pay close attention to image sharpness and clarity. You’ll notice when the lens spacing aligns properly with your interpupillary distance because text becomes crisp and objects appear well-defined.
Test different settings by moving the adjustment mechanism gradually in both directions.
Don’t rush this process—take time to evaluate each position thoroughly. You’ll know you’ve found the best setting when you achieve clear vision without double images or blurriness.
The correct IPD adjustment eliminates eye strain and provides comfortable viewing during extended VR sessions, making this calibration essential for your overall experience.
Positioning the Headset for Optimal Eye-to-Lens Alignment

Now that you’ve adjusted your IPD settings, you’ll need to position the headset properly against your face to center the lenses with your eyes.
Start by loosening all straps and placing the headset so the optical axis of each lens aligns with your pupils, using your nose as a reference point.
Once positioned, tighten the straps gradually to guarantee the headset sits flush against your face and eliminates any light leakage around the edges.
Center Lenses With Eyes
Since proper eye-to-lens alignment forms the foundation of any comfortable VR experience, you’ll want to position your headset so the lenses sit directly in front of your eyes. This guarantees the optical axis aligns perfectly with your line of sight, maximizing visual clarity and immersion.
To achieve ideal centering, follow these key steps:
- Adjust headset height by loosening straps until it rests comfortably over your eyes without vision obstruction.
- Configure interpupillary distance (IPD) using the dial or slider to match your unique eye spacing (typically 64mm for adults).
- Tilt the headset slightly with both hands to find the most comfortable viewing angle and reduce distortion.
- Ensure proper fit that’s neither too tight nor loose, preventing discomfort while maintaining lens alignment.
Eliminate Light Leakage
Light leakage can instantly break your VR immersion and strain your eyes during extended sessions. To eliminate light leakage, position your headset so it sits snugly against your face without gaps.
Align the optical axis of the lenses with your eyes by ensuring the nose bridge rests comfortably for proper lateral alignment. Use the side dials to achieve the right tilt, allowing lenses to sit flush against your face.
Configure your interpupillary distance settings to match the distance between your pupils, ensuring both lenses align correctly with your eyes.
Regularly adjust the straps to maintain a secure headset fit during use. Check for any light entering from the top or sides, and make necessary positioning adjustments to eliminate external light interference completely.
Fine-Tuning Lens Distance and Depth Adjustments
After you’ve located your headset’s lens adjustment wheel on the bottom left side, you’ll need to fine-tune both the distance and depth settings to match your specific facial structure and interpupillary distance.
Use the depth adjustment buttons to control how close the lenses sit to your face. This reduces eye strain during extended sessions and improves overall comfort.
- Adjust both lenses consistently to prevent visual distortion
- Gently tilt the headset arms for better lens positioning
- Test visual clarity after each lens adjustment
- Readjust settings when sharing with other users
Check that both sides match perfectly to maintain immersion.
If you’re sharing your headset, remember to readjust these settings for each user’s unique measurements. Regular fine-tuning guarantees ideal image quality and depth perception throughout your VR experience.
Eliminating Visual Distortions Through Proper Headset Angle

Perfect lens positioning won’t eliminate visual distortions if your headset sits at the wrong angle on your head. You’ll need to tilt the headset using both hands until the lenses align perfectly with your eyes, reducing chromatic aberration and visual distortion.
| Adjustment Method | Visual Improvement |
|---|---|
| Proper headset angle alignment | Reduces chromatic aberration |
| Side dial adjustments for flush fit | Minimizes light leakage |
| Regular tilt checking | Prevents distortion issues |
| Combined lens spacing adjustments | Enhances overall clarity |
Adjust the side dials so the headset sits flush against your face, minimizing light leakage while improving clarity. Regular headset angle checks prevent distortion issues from improper positioning. When you combine proper tilt with IPD and lens spacing adjustments, you’ll achieve the best visual experience and enhanced immersion.
Balancing Comfort and Visual Quality With Strap Adjustments
While proper lens alignment creates the foundation for clear visuals, you’ll need to balance headset pressure with visual quality through strategic strap adjustments.
Your comfort directly impacts visual clarity. When you can’t wear the headset comfortably for extended periods, you’ll constantly readjust, disrupting your experience and affecting the distance (IPD) between your eyes and lenses.
Fine-tune your fit using these key adjustments:
- Top strap: Reduce forehead pressure while maintaining proper angle of the headset
- Side dials: Prevent tilting that causes visual distortion and blurriness
- Back dial: Distribute weight evenly to stop the headset from sliding down
- Overall tightness: Minimize light leakage without creating uncomfortable pressure points
Testing and Calibrating Your Perfect Lens Configuration
Once you’ve achieved a comfortable headset fit, you can move on to fine-tuning your lens configuration for maximum visual clarity.
Start with the lens adjustment wheel to set your IPD around 64mm, then make incremental changes until visuals appear sharp. Use depth adjustment buttons to modify the distance between lenses and your face, making sure they’re positioned ideally without causing discomfort.
Test each adjustment by briefly wearing the headset and checking for distortion or light leakage. If issues persist, revisit side dial adjustments to make certain the headset sits flush against your face.
Make consistent adjustments on both sides to prevent double vision and eye strain. Continue fine-tuning until you achieve ideal clarity for both eyes, testing after each modification to confirm improved visual fidelity.
Frequently Asked Questions
How Should a VR Headset Sit on Your Head?
Your VR headset should sit comfortably over your eyes with lenses aligned to your optical axis. Adjust the back dial snugly, tighten the top strap for weight support, and center it using your nose as a guide.
How to Position VR Headset?
Loosen all straps first, then place the headset over your face. Adjust the IPD for clear visuals, tighten the back strap snugly, use the top strap for support, and tilt gently for ideal clarity.
How Do I Adjust the Lens on My Oculus?
You’ll find the lens adjustment wheel on your headset’s bottom left side for spacing. Use depth adjustment buttons to modify distance from your face, then gently tilt until you achieve ideal clarity.
How Do I Focus My VR Headset?
You’ll need to locate the lens adjustment wheel on your headset’s bottom left side. Turn it slowly until the visuals become sharp and clear, then use depth adjustment buttons for comfortable positioning.


Leave a Reply