You can greatly improve your budget headset’s FOV by adjusting the physical fit and positioning for maximum lens proximity to your eyes. Fine-tune your IPD settings through software calibration, replace thick face gaskets with thinner alternatives, and explore custom firmware updates that enable FOV parameters. Utilize third-party software tools for display scaling, configure per-eye overlap settings, and leverage game-specific FOV options in racing simulators and flight games. These strategic modifications will transform your immersive experience entirely.
Optimize Physical Headset Positioning and Fit
While budget headsets often compromise on FOV compared to premium models, you can greatly improve your viewing experience by mastering the fundamentals of proper positioning and fit.
Start by adjusting the head straps for a snug fit that maximizes FOV and reduces light leakage. Check your headset’s interpupillary distance settings to verify proper eye alignment, enhancing both perceived FOV and visual clarity.
Use adjustable face gaskets to minimize gaps between your eyes and lenses, creating better immersion.
Don’t underestimate experimenting with tilt and angle adjustments—slight changes considerably affect display visibility. If your headset includes optical adjustments, fine-tune lens positioning for ideal alignment.
When you refine physical headset positioning and fit correctly, even budget models can deliver impressive visual experiences regardless of refresh rate limitations.
Adjust IPD Settings Through Software Calibration
You’ll need to measure your IPD accurately using software tools since most budget headsets lack hardware adjustment mechanisms.
Start with your measured IPD value, then fine-tune the settings incrementally to find your sweet spot for ideal visual clarity.
Small adjustments of just 1-2mm can dramatically improve image sharpness and reduce the blurry edges that plague budget VR experiences.
Software IPD Measurement Tools
Why struggle with blurry visuals when your budget headset likely includes software tools to measure and adjust your interpupillary distance?
Software IPD measurement tools can accurately determine your eye spacing, enabling personalized adjustments that dramatically enhance comfort and visual clarity. These tools work by analyzing your facial features through the headset’s cameras or tracking systems, providing precise measurements without requiring physical rulers.
Most budget headsets now include built-in calibration software that guides you through the measurement process step-by-step. You’ll simply follow on-screen prompts while the system calculates your IPD automatically. This eliminates guesswork and guarantees ideal lens alignment for your unique eye distance.
Many VR platforms also offer real-time adjustment features, letting you test changes during gameplay until you achieve perfect visual clarity and depth perception.
Fine-Tuning Distance Values
Once you’ve obtained your precise IPD measurement, the real optimization begins with fine-tuning your headset’s distance values through software calibration.
Most budget headsets include companion apps or built-in calibration tools that let you adjust your interpupillary distance (IPD) settings beyond basic physical adjustments. Don’t settle for the initial measurement—experiment with values slightly above and below your measured IPD to discover what maximizes your visual clarity and immersion.
Headset manufacturers regularly release firmware updates that enhance these calibration tools, so check for updates frequently.
You’ll need to re-calibrate when switching users or after extended use sessions. This fine-tuning process directly impacts your FOV experience, reducing eye strain while improving overall visual fidelity in VR applications.
Visual Clarity Optimization
Three critical software calibration steps separate blurry, uncomfortable VR experiences from crystal-clear immersion on budget headsets.
Since many affordable headsets like the DPVR E4 lack hardware IPD sliders, you’ll need to rely on software adjustments to achieve peak visual clarity.
First, download your headset’s companion app, such as DPVR Assistant 4, which provides access to IPD calibration settings.
Second, measure your actual interpupillary distance using a ruler or smartphone app for accurate baseline data.
Third, systematically adjust the software IPD settings while testing visual clarity with text-heavy content or detailed environments.
Properly calibrated IPD settings eliminate the blurriness associated with fixed lens positions, dramatically improving instrument readability in simulation games.
You’ll notice reduced eye strain and enhanced comfort during extended VR sessions, making budget headsets surprisingly competitive with premium alternatives.
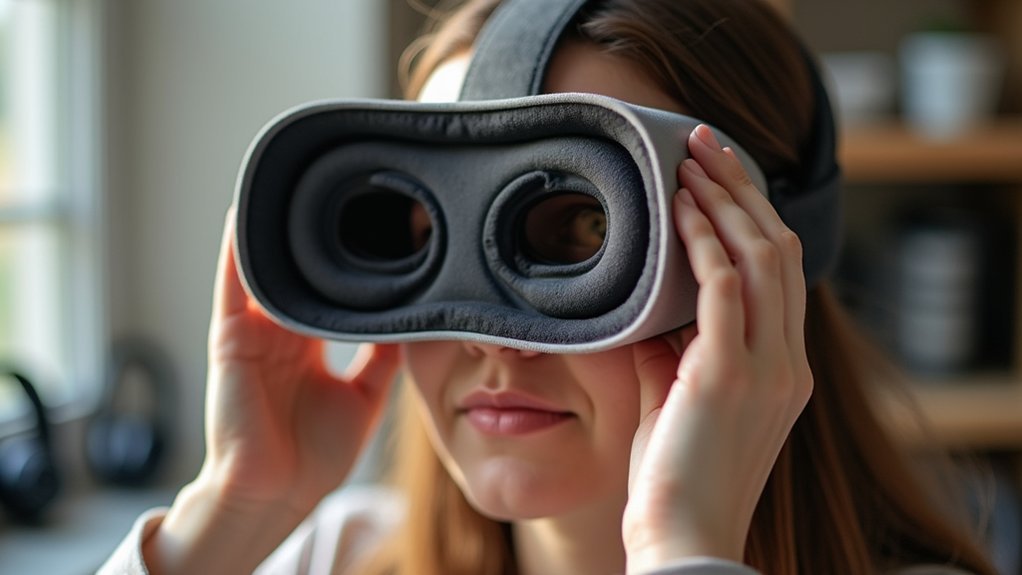
Replace Default Face Gaskets With Thinner Alternatives
You can markedly expand your headset’s FOV by swapping the default face gasket for a thinner aftermarket alternative that positions your eyes closer to the lenses.
Several companies manufacture silicone and foam gaskets specifically designed for popular budget headsets, offering various thickness options to match your comfort preferences.
Before installation, you’ll want to verify compatibility with your specific model and follow proper cleaning procedures to maintain hygiene and optical performance.
Aftermarket Gasket Options
While budget headsets often come with thick default face gaskets that create unnecessary distance between your eyes and the lenses, swapping them for thinner aftermarket alternatives can greatly boost your field of view.
These aftermarket gasket options make a big difference in visual immersion and clarity by positioning your eyes closer to the optics.
You’ll find various vendors offering thinner gasket materials that conform better to your face, improving light blocking and comfort while reducing light leakage.
Most aftermarket options feature tool-free installation, allowing quick swaps between different gaskets.
However, you must verify compatibility with your specific headset model before purchasing to guarantee proper fit.
Users consistently report noticeable improvements in FOV and overall immersion when upgrading from default gaskets.
Installation Safety Tips
Before attempting any gasket replacement, power down your headset completely and disconnect all cables to prevent accidental damage during the installation process.
When removing original face gaskets, use plastic prying tools or small screwdrivers carefully to avoid damaging delicate components. Work slowly around the edges, applying gentle pressure to release clips or adhesive without forcing anything.
Once you’ve installed the new gasket, test the fit immediately. Put on your headset and check for secure positioning against your face. Look for light leakage around the edges, which can break immersion and indicate improper installation. If you notice gaps, remove and reinstall the gasket properly.
Always handle replacement face gaskets with clean hands to maintain hygiene and prevent oils from transferring to the material before first use.
Utilize Display Scaling and Resolution Adjustments
Display scaling and resolution adjustments offer some of the most accessible solutions for maximizing your budget headset’s visual experience. You can utilize display scaling to match your headset’s render resolution to its actual capabilities, creating clearer visuals within your limited FOV.
Increasing in-game resolution settings provides more detailed imagery, making instruments and surroundings easier to read despite the narrow field of view.
Most VR titles support super sampling or resolution scaling, which boosts image quality without severely impacting performance on budget hardware. You’ll want to prioritize resolution over frame rate in your game settings to achieve sharper visuals.
Don’t forget to experiment with custom settings or mods that enhance instrument readability, helping you focus on essential details.
Implement Software-Based FOV Enhancement Tools
Software solutions can dramatically expand your perceived field of view without requiring expensive hardware upgrades.
Software-based FOV enhancement tools manipulate the rendering pipeline by adjusting aspect ratios and optimizing display settings for specific VR applications. You can utilize dynamic foveated rendering to improve perceived FOV by prioritizing high detail in your gaze center while reducing peripheral detail.
Community-developed mods for popular VR games offer custom FOV adjustments beyond hardware limitations.
SteamVR allows you to modify FOV settings directly through game launch options or configuration files, creating a customized experience tailored to your preferences.
You can also experiment with lens distortion settings to mitigate visual artifacts associated with narrower FOV, enhancing immersion and clarity in your peripheral vision.
Modify Lens Distance for Maximum Viewing Area

You can greatly expand your budget headset’s viewing area by adjusting how close the lenses sit to your eyes.
Start by tweaking your headset’s lens proximity settings to bring the optics as close as possible without causing discomfort.
You’ll also want to use thinner face gaskets and dial in your IPD configuration to make sure the lenses align perfectly with your pupils for maximum FOV coverage.
Adjust Lens Proximity Settings
When lens proximity isn’t enhanced on budget headsets, you’re missing out on valuable viewing area that could greatly improve your VR experience.
Most budget headsets feature adjustable IPD settings that you can fine-tune to align lenses perfectly with your eye spacing, maximizing your effective FOV. You’ll want to adjust lens proximity settings by positioning lenses as close to your eyes as comfortably possible – this simple tweak prevents the lower FOV that plagues many budget models.
Experiment with different lens positions based on your facial structure, and consider adding or removing padding to achieve ideal distance.
If your headset lacks built-in proximity adjustments, aftermarket lens spacers or adapters can create the perfect eye-to-lens distance, reducing vignetting and expanding your peripheral vision considerably.
Minimize Face Gasket Thickness
Since most budget headsets ship with thick face gaskets that push your eyes away from the lenses, you’re likely experiencing a narrower FOV than your headset can actually deliver.
Reducing your face gasket thickness brings your eyes closer to the lenses, greatly expanding your perceived viewing area.
You can experiment with thinner aftermarket gaskets or carefully modify your existing one by removing foam layers.
Some users achieve excellent results using custom spacers or intermediary materials to fine-tune the distance.
When modifying your face gasket, make sure you maintain a snug, comfortable fit that doesn’t create pressure points.
Remember to preserve proper light sealing during modifications—any light leakage will compromise your immersive experience.
Test different configurations to find the sweet spot between maximum FOV and sustained comfort.
Optimize IPD Configuration
While many VR enthusiasts focus on hardware modifications, proper IPD (interpupillary distance) configuration often delivers the most dramatic FOV improvements for budget headsets.
You’ll need to accurately measure your IPD using a ruler or online tool to guarantee ideal lens alignment with your eyes.
Budget headsets like the DPVR E4 typically require software adjustments rather than physical IPD controls.
Download the companion app and familiarize yourself with its IPD settings for precise configurations.
Since fixed IPD options can limit your viewing area, you’ll want to experiment with slight variations in the software settings.
Even small IPD adjustments greatly impact your perceived FOV and can eliminate visual distortions.
Regularly recalibrate these settings, especially when sharing your headset with others who’ve different eye distances.
Explore Custom Firmware and Driver Updates
Although budget headsets often come with limited FOV settings out of the box, you can greatly expand your visual experience through custom firmware and strategic driver updates.
Custom firmware modifications can release adjustable FOV parameters that manufacturers typically restrict, allowing you to fine-tune your headset beyond default limitations.
Custom firmware unlocks hidden FOV adjustments that manufacturers deliberately limit, giving you complete control over your headset’s visual boundaries.
Start by checking your manufacturer’s website for the latest official driver updates, which often include tracking accuracy improvements that stabilize visuals and enhance perceived FOV.
Community-developed firmware offers even more potential, providing access to advanced calibration settings unavailable in standard software.
Consider using third-party applications that enable deeper customization of display metrics.
These tools let you maximize your headset’s FOV potential through adjustments that standard interfaces don’t support, markedly improving your overall VR experience.
Configure Per-Eye Display Overlap Settings
When you configure per-eye display overlap settings correctly, you’ll maximize your budget headset’s available screen real estate and create a more seamless visual field. This adjustment reduces the tunnel vision effect that plagues many affordable VR devices by enhancing how each display panel contributes to your overall FOV.
Most budget headsets include companion software that lets you tweak per eye settings individually. You’ll want to experiment with different overlap configurations since the ideal setting depends on your interpupillary distance and personal comfort preferences.
Proper overlap minimizes visual artifacts while improving depth perception, making virtual environments feel more natural and engaging.
Start with small adjustments and test each configuration thoroughly. Finding your best per-eye overlap setting transforms your budget headset’s visual experience considerably.
Apply Third-Party FOV Expansion Modifications
Third-party FOV expansion modifications can release your budget headset’s hidden visual potential by extending the field of view beyond manufacturer limitations.
These community-developed solutions transform restrictive viewing angles into immersive experiences that rival premium headsets.
Here’s how to leverage third-party FOV expansion modifications:
- Research compatibility – Check forums for your specific headset model like Quest 2 or dpvr E4
- Download verified mods – Use established community sources with positive user feedback
- Follow installation guides – Access detailed step-by-step tutorials from support communities
- Backup original files – Protect against potential performance issues or visual artifacts
- Test incrementally – Apply modifications gradually to identify ideal settings
While these modifications require technical knowledge and careful installation, they’ll greatly enhance your VR immersion without purchasing expensive hardware upgrades.
Leverage Game-Specific FOV Scaling Options
Why struggle with hardware limitations when many VR games include built-in FOV scaling options that’ll expand your viewing experience?
You’ll find dedicated FOV adjustments in flight simulators like DCS, where scaling options enhance peripheral vision and boost immersion despite hardware constraints. Racing games offer similar benefits—adjusting FOV settings improves track visibility and creates a more expansive view of your surroundings.
Don’t overlook community resources when enhancing your setup. Gaming forums and guides contain treasure troves of ideal FOV configurations tested specifically with budget headsets. Fellow users share settings that maximize viewing angles for different games and hardware combinations.
Take time exploring each game’s video or display settings menus. You’ll often discover FOV sliders, scaling multipliers, or field-of-view presets that dramatically improve your visual experience without requiring expensive hardware upgrades.
Frequently Asked Questions
What Is the Ideal FOV for VR?
You’ll find the ideal VR field of view ranges from 100 to 110 degrees, providing immersive experiences without tunnel vision. You’ll get enhanced presence and comfort within this range for most applications.
Why Is My VR Headset Always Blurry?
Your VR headset’s blurry because you haven’t adjusted your IPD settings correctly, your lenses are dirty, or you’re wearing the headset improperly. Clean the lenses and check your interpupillary distance configuration.
What VR Headset Has the Highest Field of View?
You’ll find the Pimax 8K X offers the highest field of view at 200 degrees, greatly surpassing competitors like the Valve Index’s 130 degrees or Varjo Aero’s 115 degrees for maximum immersion.
What FOV Is Quest 3?
You’ll get approximately 110 degrees horizontal field of view with the Quest 3. This represents a significant improvement over the Quest 2, giving you better immersion and reducing that restrictive tunnel vision effect.


Leave a Reply