You’ll fix VR FOV distortion by adjusting your headset height positioning, fine-tuning lens distance and eye relief settings, and using grid-based calibration tests to detect visual artifacts. Configure distortion parameters like fit_x and fit_y values, correct stereo depth alignment to prevent double vision, and create custom distortion profiles for your specific hardware. Update software regularly, optimize rendering performance with dynamic resolution scaling, and implement stencil buffer techniques. These systematic adjustments will transform your blurry, uncomfortable experience into crystal-clear immersion.
Optimal Headset Positioning and Height Adjustment
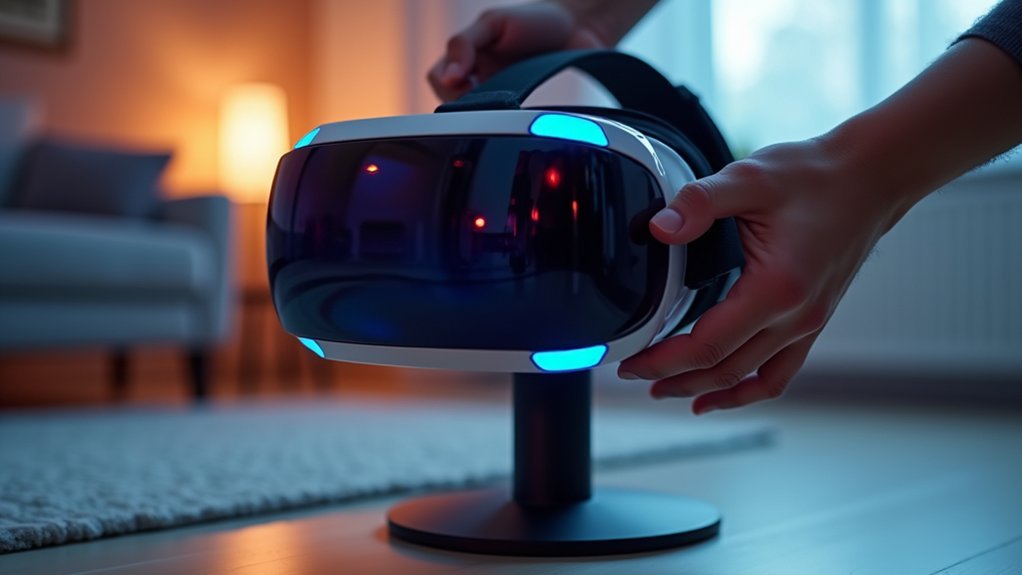
Precision in headset placement directly impacts your VR experience’s visual quality. Incorrect vertical positioning creates significant distortion and discomfort that’ll ruin immersion.
Poor headset positioning destroys VR immersion through visual distortion and physical discomfort that completely undermines the experience.
You’ll need to find the sweet spot where horizontal lines appear completely flat through your display. Start with ideal headset positioning by wearing it higher on your face than feels natural. While this position might seem uncomfortable initially, it dramatically reduces distortion for most users.
Use grid image calibration to verify proper lens alignment with your eyes. Test different heights systematically until you achieve visual clarity. Your lenses should align perfectly with your pupils for maximum effectiveness.
Consider using calibration tools within VR software like PiTool for precise adjustments. These visual aids help determine optimal lens distance and provide guidance for maintaining consistent positioning across gaming sessions.
Lens Distance and Eye Relief Calibration
You’ll need to fine-tune your lens distance to eliminate visual artifacts that cause FOV distortion in your VR headset.
Start by adjusting the eye relief settings until your eyes align perfectly with the optical sweet spot of each lens.
This calibration directly impacts image clarity and prevents the blurriness that contributes to distortion around your field of view edges.
Optimal Lens Positioning
When your VR headset sits incorrectly on your face, even the most advanced distortion correction software can’t compensate for the fundamental visual artifacts that result from poor lens positioning.
You’ll need to focus on achieving ideal lens positioning by adjusting your headset’s height until horizontal lines appear perfectly straight. Use a grid image as your calibration reference and slowly move the headset up or down on your face while observing the visual changes.
Many users discover that positioning the headset higher on their face dramatically improves visual clarity and reduces distortion.
Don’t forget to calibrate your eye relief distance simultaneously, ensuring the lenses sit at the correct distance from your eyes. This combined approach eliminates most FOV distortion issues you’ll encounter.
Eye Relief Adjustment
Beyond proper headset positioning, fine-tuning your eye relief distance creates the foundation for distortion-free VR visuals.
Eye relief adjustment directly impacts your perceived field of view and eliminates uncomfortable visual artifacts that plague many users.
Start by positioning your eyes at the ideal distance from the lenses. Too close creates blurriness at FOV edges, while too far reduces immersion and clarity.
Experiment with different eye relief settings—even minor adjustments dramatically improve your experience and prevent world warping symptoms.
Use a grid image for precise calibration. Adjust your headset’s height until horizontal lines appear completely flat. This indicates proper eye relief adjustment.
Don’t forget to configure your IPD settings, aligning lenses with your interpupillary distance for maximum comfort and minimal distortion.
Grid-Based Alignment and Visual Testing
You’ll achieve precise VR calibration by using grid images to test and adjust your headset’s alignment.
Start by loading a grid pattern and positioning your headset higher on your face until horizontal lines appear perfectly flat across your field of view.
This visual testing method lets you detect distortion patterns like edge squishing and fine-tune your setup for ideal clarity.
Grid Image Calibration Setup
One vital step in achieving proper FOV distortion correction involves using a grid image to visually calibrate your headset’s positioning. Save a grid image to your desktop and zoom it until it completely fills your monitor. This grid image calibration setup provides the visual reference you’ll need for accurate alignment testing.
Put on your Pimax headset while viewing the desktop display. Adjust the headset’s height on your face until the horizontal grid lines appear perfectly flat. This positioning is essential for ideal FOV performance and distortion reduction.
The correct vertical placement greatly impacts visual clarity, so take time to find your sweet spot. Community feedback consistently shows that positioning the headset higher on your face typically reduces distortion, though personal adjustments remain essential for achieving the best immersive VR experience.
Headset Height Positioning
While maintaining the grid image on your monitor, focus on achieving precise headset height positioning through systematic visual testing. Start by adjusting your headset vertically until the horizontal lines appear completely flat without any curvature or warping.
You’ll likely find that elevating the headset reduces distortion considerably, even though this higher position might feel less comfortable initially.
Move your head side to side while observing the grid lines – they should remain stable without stretching or squishing. Most users discover that proper headset height positioning requires the device to sit higher than their initial instinct suggests.
Use PiTool’s integrated calibration features to fine-tune your placement. This systematic approach guarantees ideal visual alignment, greatly improving clarity and creating a more immersive VR experience with minimal distortion.
Distortion Detection Methods
Before making any height adjustments, establish a reliable detection system that reveals even subtle distortion patterns in your VR display. These distortion detection methods help you identify alignment issues before they impact your experience.
Grid-based alignment serves as your primary calibration tool. You’ll want to zoom in on a grid image until it fills your monitor completely, then wear your headset to observe how horizontal lines appear. Properly aligned grids should display flat, straight lines without curves or warping.
Visual testing complements grid alignment by letting you assess rendered shapes and dimensions. Here are three essential detection steps:
- Load grid calibration images and examine line straightness across your entire field of view.
- Test geometric shapes to verify they maintain intended proportions and angles.
- Experiment with different headset placements while monitoring distortion changes in real-time.
Distortion Parameter Fine-Tuning

Three critical parameters determine whether your VR headset delivers crystal-clear visuals or leaves you reaching for motion sickness remedies: lens offset, scale factors, and fit settings.
When fine-tuning distortion parameters, you’ll need to adjust these values systematically for each eye to prevent double vision and blur that destroys stereo depth perception.
Start by modifying fit_x and fit_y settings to optimize overall scaling parameters. These adjustments directly impact how rendered images align with your visual perception.
Remember that smaller distortion scales often trigger motion sickness, so you’ll want to test thoroughly with user feedback.
Compare your results against established demo standards to identify discrepancies. This comparison reveals misalignments that compromise visual clarity and comfort, ensuring your calibration delivers the immersive experience users expect.
Stereo Depth Alignment Corrections
When stereo depth alignment goes wrong, your brain struggles to merge the separate images from each eye into a cohesive 3D scene.
This misalignment creates double vision, eye strain, and blurred close objects that destroy immersion. You’ll need to correct these stereo depth issues through precise parameter adjustments.
Here’s how to fix stereo depth alignment:
- Adjust fit_x and fit_y parameters to scale and position images correctly for each eye’s unique viewing angle.
- Test overlapping image zones where stereo depth perception is most critical, particularly for near-field objects.
- Create custom distortion profiles tailored to your headset’s specific optical characteristics and lens positioning.
Regular testing with user feedback helps identify persistent stereo depth problems.
Fine-tune these corrections iteratively until comfortable, clear depth perception emerges.
Viewport and Rendering Area Optimization
After correcting stereo depth alignment issues, you’ll need to optimize your viewport and rendering area to eliminate remaining FOV distortions.
Dynamic resolution scaling lets you maintain consistent performance while maximizing your effective field of view, especially when graphical demands spike.
You can further enhance efficiency through fragment culling techniques that eliminate off-screen objects and stencil buffer optimization that reduces unnecessary pixel processing.
Dynamic Resolution Scaling
Since VR applications demand consistent frame rates to prevent motion sickness, dynamic resolution scaling emerges as a critical optimization technique that automatically adjusts rendering quality based on real-time performance metrics.
You’ll find this approach maintains visual fidelity while avoiding performance drops that cause discomfort.
Dynamic resolution scaling works by monitoring your system’s computational load and reducing rendering workload when necessary.
Here’s how you can optimize this technique:
- Implement frustum culling to eliminate off-screen object processing and skip invisible geometry
- Apply fixed foveated rendering to decrease peripheral resolution while maintaining central clarity
- Adjust viewport size and aspect ratios properly to guarantee consistent visual output across different headsets
Fragment Culling Techniques
Fragment culling techniques represent one of the most effective methods for optimizing VR rendering performance by eliminating unnecessary pixel processing before it burdens your GPU.
You can implement off-screen object culling to discard fragments outside your viewport, greatly boosting frame rates by preventing rendering of invisible elements.
Stencil buffers offer another powerful approach—they let you mark screen areas that don’t require processing, streamlining your rendering pipeline.
Adjusting viewport size to match your effective FOV reduces unnecessary pixel generation while minimizing edge distortion.
These fragment culling techniques work exceptionally well with dynamic resolution scaling, maintaining visual quality during intensive scenes.
Stencil Buffer Optimization
When you implement stencil buffer optimization, you’re fundamentally creating a pixel-perfect mask that defines exactly which areas of your screen require rendering. This technique prevents your GPU from processing pixels outside the visible viewport, dramatically reducing unnecessary computational overhead in VR applications.
Stencil buffers give you precise control over pixel processing, allowing you to minimize distortion effects at wide-FOV lens edges while maintaining visual fidelity.
You’ll achieve better resource utilization and smoother performance by restricting rendering to essential areas only.
Key optimization strategies include:
- Viewport masking – Create accurate stencil masks that match your HMD’s lens geometry
- Dynamic adjustment – Modify stencil settings based on scene complexity and performance requirements
- Edge refinement – Fine-tune buffer boundaries to reduce visual artifacts and enhance depth perception
Hardware-Specific FOV Configuration
Although VR headsets share fundamental display principles, each model’s unique hardware architecture demands specific FOV configuration approaches to maximize visual quality and minimize distortion.
Your hardware-specific FOV configuration begins with understanding how your headset measures field of view—whether it’s horizontal, vertical, or diagonal FOV. Pimax headsets, for instance, prioritize diagonal measurements that directly impact immersion levels.
Understanding your headset’s FOV measurement method—horizontal, vertical, or diagonal—forms the foundation of effective hardware-specific configuration for optimal immersion.
You’ll need to adjust your interpupillary distance (IPD) precisely, as incorrect settings reduce effective FOV and create visual discomfort.
Don’t overlook headset height positioning; vertical alignment with lenses considerably affects distortion patterns. Many users find that fine-tuning headset placement eliminates distortion issues entirely.
Leverage your headset’s customizable FOV settings and calibration tools to accommodate individual differences in your specific hardware configuration.
Software Update and Compatibility Checks
Software updates serve as your primary defense against FOV distortion, since developers continuously refine rendering algorithms and compatibility protocols that directly impact visual clarity.
You’ll want to establish a routine for checking both headset firmware and application software updates, as these often contain critical fixes for distortion issues and enhanced hardware compatibility.
Your compatibility verification process should include:
- Driver synchronization – Verify your graphics drivers align with the latest operating system updates to prevent conflicts that worsen FOV distortion.
- Debug tool utilization – Use Oculus Debug Tool or similar utilities to fine-tune settings for specific applications.
- Version testing – Test different software versions to identify which configurations provide the most stable, distortion-free experience.
Monitor community feedback regarding software updates to catch undocumented compatibility issues early.
Custom Distortion Profile Creation
Since every VR headset exhibits unique optical characteristics and your interpupillary distance creates a distinct viewing profile, you’ll need to develop a custom distortion correction profile that precisely matches your hardware and physiology.
Custom distortion profile creation begins with accurately calculating lens offset and distortion parameters specific to your headset, enabling higher FOV utilization with minimal visual artifacts.
Use grid images to guide headset height and lens positioning calibration, ensuring proper alignment that reduces distortion effects.
Compare your custom profile against established demos to identify discrepancies requiring adjustment. Your feedback is essential for fine-tuning distortion parameters, as individual perception differences notably impact profile effectiveness.
Implement custom shaders or lens correction profiles in your rendering software to address specific distortion issues unique to your headset’s characteristics.
Performance-Based Rendering Adjustments
When you’re pushing VR headsets beyond their native FOV limits, rendering performance becomes the bottleneck that determines whether your visual improvements actually enhance or degrade the experience.
Performance-based rendering adjustments let you maintain smooth frame rates while preserving visual quality across wider fields of view.
These optimization strategies keep your VR experience fluid:
- Dynamic resolution scaling – Automatically adjusts render resolution based on GPU load, maintaining consistent frame rates during demanding scenes while rendering wider FOVs.
- Aggressive culling techniques – Removes off-screen objects from the rendering pipeline, focusing processing power on visible areas within your expanded field of view.
- Fixed foveated rendering – Reduces pixel density in peripheral vision areas, optimizing performance for headsets with narrow native FOVs.
Regular performance testing across different devices helps identify rendering artifacts and distortion issues at wide-FOV lens edges.
Frequently Asked Questions
What Is the Ideal FOV for VR?
You’ll want a horizontal FOV between 100-110 degrees for ideal VR immersion. This range mirrors your natural vision, reduces motion sickness, and makes virtual environments feel expansive rather than constricting for maximum comfort.
How to Get High FOV in VR?
You’ll achieve high FOV by selecting advanced headsets like Pimax with 200-degree capabilities, adjusting camera properties in game engines, implementing foveated rendering, using dynamic resolution scaling, and regularly calibrating lens parameters.
What Is VR Distortion?
VR distortion creates visual artifacts you’ll notice as warped or unclear images, especially at your field of view’s edges. It’s caused by lens properties, headset positioning, and misalignment between your eyes and optical centers.
What Is the Highest FOV in Pimax?
You’ll find the highest FOV in Pimax reaches 200 degrees diagonally on models like the 8KX, with horizontal FOV hitting 160 degrees and vertical extending to 110 degrees maximum.
Leave a Reply