You’ll want to prioritize ergonomic layouts with 10-degree clockwise slants and 36-39mm button spacing to reduce hand fatigue by 40%. Position essential actions like grab and movement within your thumb’s natural range, while mapping combat controls like dodge to bumpers and block to triggers. Consider one-handed configurations for accessibility, racing setups with throttle on right trigger, and social VR schemes with haptic feedback. Creative tool layouts should mirror real-world workflows for intuitive use. These foundational principles will transform your VR control experience considerably.
Ergonomic Hand Position Layouts for Extended VR Sessions
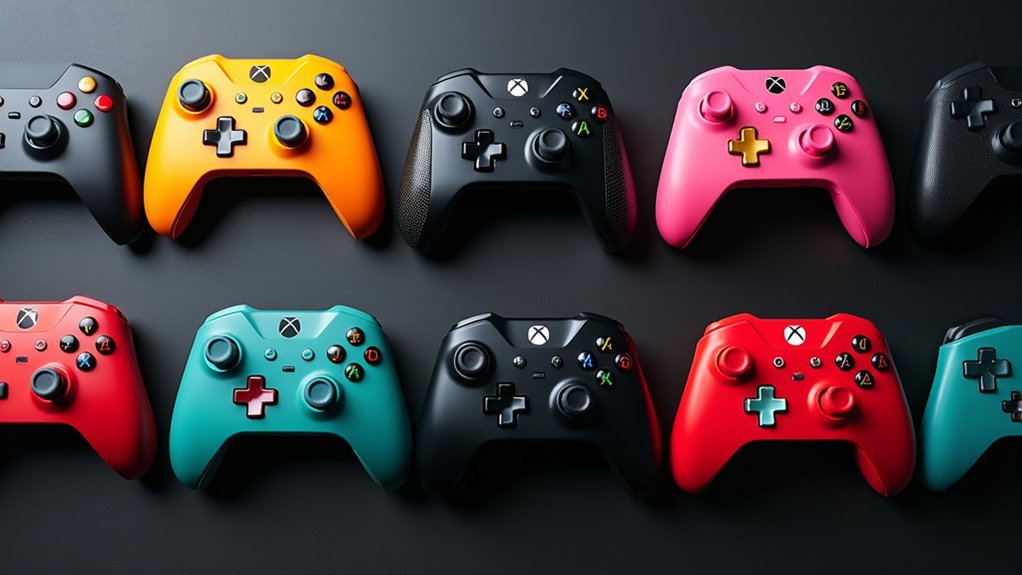
While traditional gaming controllers work fine for short sessions, extended VR gameplay demands a completely different approach to button layout design.
You’ll need ergonomic hand positioning that follows your hand’s natural arch, allowing buttons to align perfectly with your fingers to minimize fatigue and improve accessibility.
Consider implementing a slight 10-degree clockwise slant in your button layout to enhance finger movement efficiency. This makes reaching various controls more comfortable during long sessions.
Row shaping that staggers button placement reduces the distance your fingers travel, creating a more relaxed position.
Proper button spacing between 36mm to 39mm guarantees your fingers rest comfortably across multiple buttons without accidental presses.
Adding a pinky rest provides extra support for stable grip and reduced hand fatigue.
One-Handed VR Controller Configurations for Accessibility
You’ll need to strategically position essential buttons within your thumb’s natural range of motion to create an effective one-handed VR controller setup.
Integrating gesture controls and motion-based inputs can supplement traditional button functions, reducing the total number of physical inputs you’ll require.
Your thumb-only navigation system should prioritize the most critical actions like movement and selection while relegating secondary functions to voice commands or simplified gestures.
Adaptive Button Placement
When designing one-handed VR controller configurations, adaptive button placement becomes the cornerstone of accessibility, requiring careful consideration of natural hand mechanics and user comfort.
Your adaptive button placement strategy should prioritize the natural arch of your hand, ensuring controls align with your fingertips’ relaxed positions. Position larger buttons at least 36mm apart to accommodate comfortable access without strain during extended sessions.
Implement staggered rows or curved layouts that follow your hand’s natural contours. This custom controller approach allows intuitive access to multiple functions without awkward positioning.
Place essential actions like movement and interaction on your most easily reachable buttons. Test various layouts with actual hand positioning to identify ideal arrangements, then make iterative adjustments based on real-world feedback and comfort levels for one seamless experience.
Gesture Control Integration
As you shift beyond traditional button layouts, gesture control integration transforms your one-handed VR experience into an intuitive extension of natural movement.
You’ll find that gesture controls eliminate the complexity of traditional button layouts, creating a simplified interface that mimics your natural hand movements. This approach enhances accessibility for users with limited mobility while maintaining engaging gameplay.
Customizable button mappings guarantee essential functions remain within easy reach, allowing you to tailor controls to your specific needs.
Research demonstrates that well-designed one-handed configurations greatly improve user satisfaction and extend play sessions by reducing physical strain.
You’ll experience increased comfort and engagement through gesture-based controls that adapt to your unique physical abilities, making VR more inclusive and enjoyable.
Thumb-Only Navigation Systems
While gesture controls offer natural movement integration, thumb-only navigation systems provide precise control through concentrated functionality within your single digit’s range of motion.
These configurations prioritize accessibility by placing all essential functions—movement, actions, and navigation—within your thumb’s reach. You’ll benefit from ergonomic shaping that follows your thumb’s natural arc, reducing strain during extended sessions.
The systems combine thumbsticks, buttons, and touchpads for intuitive control without requiring multiple fingers. Haptic feedback provides tactile confirmation of inputs, enhancing immersion without visual dependency.
Customizable buttons and adjustable sensitivity settings let you tailor functionality to your preferences and play style. This design proves especially valuable for users with limited hand mobility, ensuring everyone can enjoy VR experiences comfortably.
Combat-Focused Button Arrangements for Action VR Games
Because action VR games demand lightning-fast reflexes and seamless combat flow, your button layout becomes critical for survival in intense battles. The Xbox One controller offers ideal button placement for combat-heavy VR experiences when properly configured.
| Function | Recommended Button |
|---|---|
| Dodge/Run | R Bumper |
| Throw | R Trigger |
| Block | L Trigger |
| Focus | A Button |
Mapping dodge and run to R bumper eliminates technical issues that arise when using two buttons for movement mechanics. Your throwing actions work best on R trigger for natural throwing motions, while L trigger provides intuitive blocking. Assigning focus to A button streamlines hand-to-hand combat without complex finger movements. Simplifying takedowns to B button enhances gameplay flow, reducing thumb fatigue during extended combat sessions.
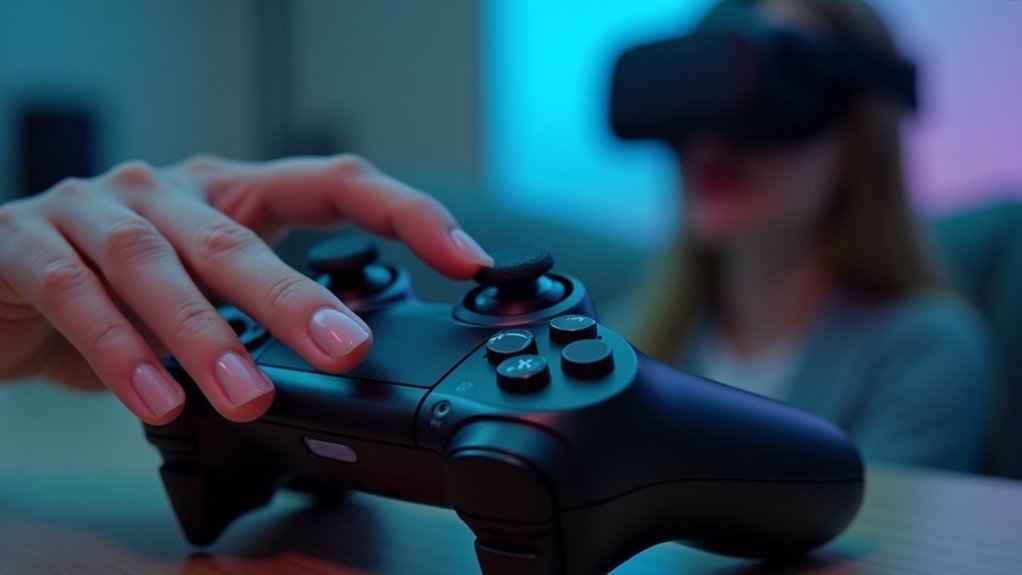
Precision Movement Controls for VR Simulation Experiences
You’ll want to map haptic response functions to buttons that align with your natural hand positions, ensuring tactile feedback enhances rather than disrupts your precision movements in VR simulations.
Six-DOF control schemes require careful consideration of button placement since you’re managing rotation and translation across multiple axes simultaneously.
The key is positioning these complex controls where your fingers can access them without compromising your grip stability or requiring awkward hand repositioning during critical maneuvers.
Haptic Response Button Mapping
As VR simulation experiences demand increasingly precise control inputs, haptic response button mapping emerges as an essential bridge between your physical movements and virtual actions.
You’ll need to take into account how different tactile responses complement one another when designing your custom layout. Map high-priority actions to buttons with stronger vibrations, while reserving subtle feedback for secondary functions.
Spacing becomes vital—you don’t want haptic responses interfering with neighboring controls during intense gameplay moments.
Calibrate your feedback intensity based on context. Combat scenarios might require sharp, distinct pulses, while exploration modes benefit from gentler tactile cues.
Evaluate button resistance levels too; emergency actions could feature firmer presses that provide unmistakable confirmation.
Your haptic mapping should create an intuitive connection between physical input and virtual consequences, enhancing immersion without overwhelming your senses.
Six-DOF Control Schemes
When shifting from traditional flat-screen interfaces to immersive VR environments, six degrees of freedom (6DOF) control schemes become your gateway to truly natural interaction within virtual spaces. You’ll need specialized input devices like VR controllers and motion tracking gloves to capture precise movements across X, Y, and Z axes, plus rotation around each axis.
| Movement Type | Primary Input | Key Benefit |
|---|---|---|
| Translation | Hand Controllers | Natural positioning |
| Rotation | Head/Hand Tracking | Intuitive orientation |
| Combined Motion | Full Body Sensors | Complete immersion |
Your button layout optimization becomes essential for maintaining comfort during extended sessions. You’ll want ergonomic designs accommodating various grip styles while incorporating intuitive mapping that reduces cognitive load. This lets you focus on spatial awareness rather than wrestling with complex controls.
Social VR Interaction Button Schemes
Social VR environments demand button schemes that feel natural and respond instantly to your social cues.
You’ll find that effective layouts prioritize essential actions like grabbing with trigger buttons and navigation through thumbstick movements. These configurations create fluid interactions that enhance your engagement within virtual spaces.
Haptic feedback mechanisms provide vital tactile responses during interactions, greatly improving your immersion and overall experience.
You’ll encounter varying approaches across platforms—some utilize radial menus for quick social access, while others implement structured grid layouts for communication options.
Customization becomes critical in social VR settings.
You can tailor button mapping to match your personal preferences, creating a more comfortable and engaging social experience that adapts to your unique interaction style and communication needs.
Creative Tool Layouts for VR Design Applications
When you’re designing VR applications for creative work, you’ll need to arrange tools spatially in ways that mirror real-world artistic workflows while maximizing efficiency.
Your button layout should prioritize the most frequently used functions within easy thumb reach, positioning secondary tools in logical clusters that don’t require awkward hand movements.
You can optimize for hand tracking by creating button zones that align with natural finger positions, ensuring smooth shifts between different creative modes without breaking your artistic flow.
Spatial Tool Arrangement
As VR design applications demand increasingly sophisticated interactions, you’ll find that spatial tool arrangement becomes the foundation for creating intuitive and efficient workflows.
Position your tools to follow your hands’ natural movement patterns, minimizing strain while maximizing accessibility. Implement staggered rows with arched button alignment that accommodates your hands’ natural curvature during extended use sessions.
Maintain proper button spacing—at least 36mm between 30mm buttons—to guarantee relaxed fingertip access without accidental activation. Position primary interaction points between 5.9cm and 9.5cm from your joystick for ideal reach efficiency.
Before finalizing your layout, test configurations using cardboard mockups or digital simulations. This prototyping approach reveals comfort issues and usability problems you might’ve missed, allowing you to refine arrangements based on actual user feedback.
Hand Tracking Optimization
Hand tracking optimization builds upon spatial arrangement principles by fine-tuning controller layouts to match your natural finger movements and grip patterns.
When designing VR interfaces, you’ll want to verify button placements align with your hand’s biomechanics for seamless interaction.
Optimize your hand tracking layouts using these key strategies:
- Mirror hand curvature – Design ergonomic layouts that follow your fingers’ natural arc to reduce fatigue
- Adjust button spacing – Scale distances based on your hand size and VR headset constraints for comfortable reach
- Implement staggered rows – Position buttons in offset patterns to maximize accessibility across different hand sizes
- Gather user feedback – Continuously test and refine layouts based on real user experiences and preferences
This optimization approach transforms awkward reaching into fluid, intuitive control schemes.
Racing and Vehicle Control Mappings in Virtual Reality
Since virtual reality racing games demand split-second reactions and precise control, you’ll need button layouts that prioritize your most essential inputs.
Map your throttle to the right trigger and brake to the left trigger for natural hand positioning and lightning-fast reflexes during high-speed sequences.
You’ll want to customize your button mappings to match your personal preferences, especially for marathon racing sessions where comfort becomes vital.
Take advantage of haptic feedback features that provide distinct tactile sensations between acceleration and braking – this helps you gauge vehicle behavior without relying solely on visual cues.
Position secondary functions like nitro boosts and gear shifts on larger, well-spaced buttons to prevent accidental presses during intense races while accommodating your VR headset’s limited field of view.
Puzzle and Strategy Game Button Configurations
Three core principles define effective button configurations for puzzle and strategy games: accessibility, efficiency, and comfort.
Smart button mapping transforms chaotic gaming sessions into fluid, intuitive experiences where every input feels natural and responsive.
You’ll want to map your most frequent actions—selecting and rotating pieces—to face buttons (A, B, X, Y) where your thumb naturally rests. This minimizes movement and reduces input lag during critical moments.
Consider these optimization strategies:
- Primary actions on face buttons – Keep selection, rotation, and confirmation within easy thumb reach
- Secondary functions on shoulders – Map inventory management and menus to L1/R1 buttons
- Single-button combinations – Assign confirm buttons that trigger selection and movement simultaneously
- Ergonomic adjustments – Test staggered button heights matching your hand’s natural curve
You can prototype different layouts using cardboard models or digital simulators before committing to permanent modifications.
Fitness and Exercise VR Controller Setups
While puzzle games demand precision and careful deliberation, fitness VR applications require controllers that can withstand intense physical movement while maintaining responsive input accuracy. You’ll need ergonomic button layouts that prioritize easy access to essential functions during vigorous workouts.
Custom button mappings enhance your engagement by letting you assign jumping or sprinting to easily reachable buttons. Controllers designed for fitness feature additional grip textures and contours that prevent slippage during intense movements.
| Button Function | Recommended Mapping |
|---|---|
| Jump/Leap | Primary trigger |
| Sprint/Run | Thumb stick click |
| Pause/Menu | Top shoulder button |
| Action/Interact | Secondary trigger |
| Reset Position | Side grip button |
Staggered button layouts accommodate your hand’s natural arch, reducing finger fatigue. Color-coded buttons help you quickly distinguish functions during high-intensity sessions.
Mixed Reality Workflow Button Arrangements
When you’re designing controllers for mixed reality workflows, button arrangements must balance productivity with comfort during extended professional sessions.
You’ll want to align buttons with your hand’s natural arch to enhance interaction during immersive work experiences. A staggered layout improves finger movement efficiency, giving you quicker access to essential functions without excessive hand adjustments.
Here’s what works best:
- Six main buttons in a common arrangement for primary functions
- 36mm to 39mm spacing between buttons for relaxed fingertip access
- Smaller secondary buttons positioned to minimize control scheme clutter
- Staggered positioning following your hand’s natural curve for ideal ergonomics
Before finalizing your design, test different layouts using cardboard models or digital simulations.
This approach helps you evaluate comfort and efficiency, ensuring your custom controller meets professional mixed reality demands.
Frequently Asked Questions
What Is the Best Button Layout for Call of Duty?
You’ll want the “Tactical” layout, mapping jump to B button and crouch to right thumbstick. Set L1 for tacticals, R1 for lethals, and circle for sliding to maximize mobility while maintaining precise aim control.
What Is the Best Button Layout in Apex?
You’ll want to use the “Default” configuration as your base, then remap “Interact” to X button and set crouching to “Hold.” Consider moving “Ping” closer for quick team communication during matches.
Can You Customize Button Layout on Xdefiant?
Yes, you can fully customize your button layout in Xdefiant. You’ll access remapping options through the settings menu, where you can adjust all controls and save multiple configurations for different scenarios.
How to Map Back Buttons on Xbox Controller?
Open the Xbox Accessories app, select your controller, then choose “Configure.” Select any button from the on-screen layout and press the back button you’d like to assign that action to.
In Summary
You’ve now got ten proven button layouts that’ll transform your VR experience from frustrating to fantastic. Whether you’re battling enemies, solving puzzles, or working out, there’s a configuration here that’ll match your needs. Don’t stick with default settings that weren’t designed for you—experiment with these layouts and find what feels natural. Your hands will thank you during those marathon VR sessions, and you’ll perform better too.


Leave a Reply