You can optimize FOV without crushing your GPU by adjusting the tangent multiplier to 0.7x using Oculus Debug Tools, which reduces GPU workload while maintaining visual quality. Custom Resolution Utility lets you create wider aspect ratios like 1920×720 for enhanced peripheral vision without hardware upgrades. Smart Smoothing technology renders at 45 FPS while delivering perceived 90 FPS performance, cutting GPU usage by approximately 50%. These techniques boost frame rates by 40-100% on mid-range cards, and there’s much more optimization potential ahead.
Understanding FOV Impact on GPU Performance

When you’re struggling with choppy VR performance, your GPU is likely working overtime to render every pixel within your headset’s field of view.
The FOV in the game directly impacts how many pixels your graphics card must process each frame. A wider FOV forces your GPU to work harder, pushing GPU utilization to its limits and causing frame drops.
Performance Metrics and Frame Rate Improvements
Since reducing your FOV can deliver dramatic performance gains, you’ll want to understand the specific metrics that matter most. When you implement a 0.7x Field of View reduction, you’re fundamentally creating a Custom Resolution that displays black bars while greatly boosting your frame rates.
| Hardware Configuration | Original FPS | Optimized FPS | Performance Gain |
|---|---|---|---|
| Mid-range GPU | 25-30 | 45+ | 40-100% |
| Oculus Quest 2 | 20-25 | 36 | 44-80% |
| Laptop 2060 Max-Q | 18-22 | 32+ | 45-78% |
You’ll notice these improvements translate to smoother VR experiences across various configurations. The black bars become negligible when you’re gaining 40-100% performance increases. Combining terrain LOD reductions with Custom Resolution adjustments maximizes these benefits, ensuring playable framerates even on demanding hardware.
FOV Reduction Techniques Using Oculus Debug Tools

You’ll need to access Oculus Debug Tools to fine-tune your headset’s field of view through tangent multiplier adjustments.
Start by modifying the tangent multiplier to 0.7x, which strikes an ideal balance between visual quality and GPU performance.
This adjustment can dramatically boost your frame rates by 40-100% while maintaining immersive peripheral vision during gameplay.
Debug Tool Setup
While most VR enthusiasts struggle with performance bottlenecks, Oculus Debug Tools offer a direct pathway to FOV optimization that can transform your gaming experience.
Setting up these tools requires running the Oculus service as your foundation. Once active, you’ll access the Tangent multiplier controls that directly affect your field of view settings.
The setup process involves launching the debug interface while your VR application runs. You can make real-time adjustments to the FOV parameters, immediately seeing how changes impact your visuals and performance gains.
The beauty of this setup lies in its dynamic nature—you’re not locked into static settings.
After making your adjustments, you’ll confirm changes by pressing Ctrl + Tab twice. This guarantees your optimized FOV settings persist throughout your gaming sessions.
Tangent Multiplier Adjustment
When you access the Tangent multiplier controls within Oculus Debug Tools, you’re manipulating the core mechanism that determines how much of the virtual world renders around your peripheral vision.
Set the tangent multiplier to 0.7x for ideal results—this reduces unnecessary pixel rendering in outer vision areas without compromising core immersion. You’ll achieve a significant performance boost with stable 45+ FPS frame rates while dramatically reducing GPU load.
Remember to press Ctrl + Tab twice to confirm your adjustments. The beauty of this method is that you can experiment with different vertical and horizontal settings while your game and Oculus service run simultaneously.
Your FOV settings persist throughout your session, letting you fine-tune performance without restarting applications.
Performance Impact Analysis
With your tangent multiplier properly configured, the performance gains become immediately apparent across different hardware configurations.
You’ll experience a substantial performance boost ranging from 40-100% in frame rates when implementing FOV reduction to 0.7x through Oculus debug tools. This dramatic improvement makes VR experiences remarkably smoother, particularly benefiting mid-range graphics cards like the 2060 Max-Q.
You can expect stable frame rates of 45+ FPS after FOV reduction implementation. Even more modest setups achieve playable experiences at approximately 36 FPS when combining reduced terrain level of detail with FOV adjustments.
The technique proves especially effective for Oculus Quest 2 users, though compatibility with older models like Rift CV1 remains uncertain. Your GPU won’t struggle rendering unnecessary pixels, delivering consistently improved performance.
Custom Resolution Utility Setup for Enhanced FOV
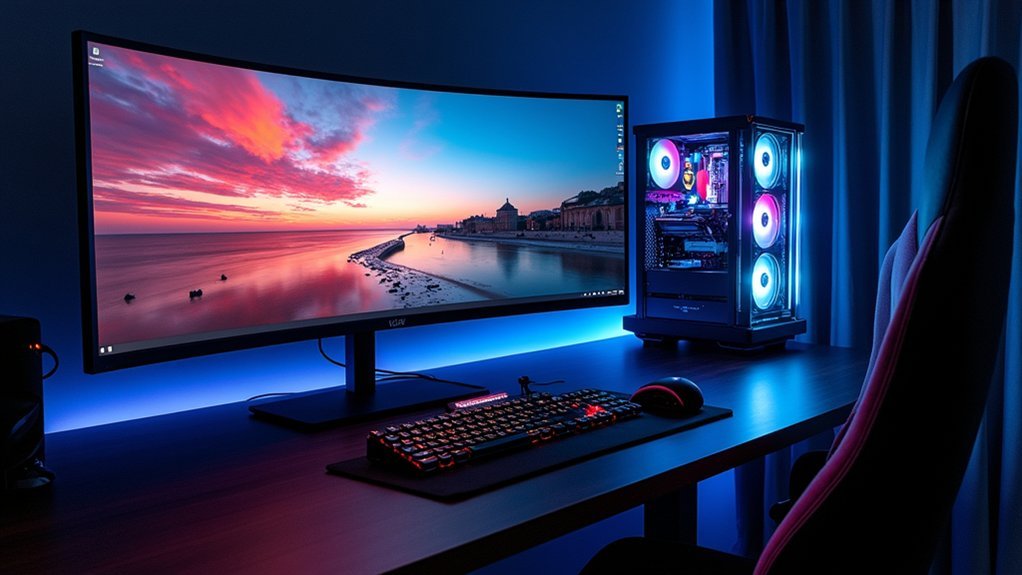
Although many gamers assume they’re stuck with their monitor’s native resolution, the Custom Resolution Utility (CRU) opens up new possibilities for expanding your field of view without expensive hardware upgrades.
This powerful tool lets you create custom resolutions tailored to enhance your gaming experience, particularly for ultrawide gaming enthusiasts seeking that coveted 21:9 aspect ratio.
Setting up CRU is straightforward. Open the application, click “Add” under Detailed Resolutions, and select GTF standard from the Timing drop-down for optimal safety.
For ultrawide gaming, try the 1920×720 resolution—it delivers excellent FOV expansion while maintaining performance. After creating your custom resolution, restart your GPU or PC to activate it.
You’ll notice black bars at the top and bottom, but this trade-off provides considerably wider peripheral vision in supported games.
Creating Custom Resolutions for Wider Viewing Angles
Creating the right custom resolution requires understanding how aspect ratios affect your viewing experience. When creating a custom resolution like 1920×720, you’ll achieve a 21:9 aspect ratio that greatly widens your FOV in supported games. You’ll likely notice black bars at the top and bottom of your screen, but this trade-off delivers an immersive wider viewing angle.
| Resolution | Aspect Ratio | FOV Benefit |
|---|---|---|
| 1920×1080 | 16:9 | Standard |
| 1920×864 | 20:9 | Enhanced |
| 1920×720 | 21:9 | Maximum |
| 2560×1080 | 21:9 | Ultra-wide |
To find the best custom resolution for your setup, experiment with different heights while maintaining your monitor’s width. Remember that creating a custom resolution won’t crush your GPU’s performance since you’re actually using fewer pixels than standard resolutions.
Smart Smoothing Technology for GPU Load Reduction
You’ll find Smart Smoothing technology cuts your GPU usage in half by rendering frames at 45 FPS while interpolating them to maintain a smooth 90 FPS experience.
This frame rate interpolation lets you push higher graphics settings without crushing your GPU, though you’ll need to manage potential ghosting artifacts that can appear around fast-moving objects.
The technology works by intelligently filling in missing frames, giving you the visual quality boost you want while keeping your system running stable.
GPU Usage Reduction
When your GPU struggles to maintain consistent frame rates in VR, Smart Smoothing technology offers an elegant solution by cutting GPU usage nearly in half while preserving smooth visual performance.
This innovative approach renders frames at half the original rate while maintaining a perceived 90 FPS, effectively eliminating frame drops that plague intensive VR experiences.
You’ll find that Smart Smoothing enables higher graphics settings without pushing your GPU beyond 80-90% usage. This balance lets you crank up visual quality while maintaining stability.
The technology works particularly well in racing simulations, though you might notice occasional ghosting with fast-moving objects in certain game types.
Despite minor trade-offs, recent improvements have markedly reduced these artifacts, making Smart Smoothing an effective tool for optimizing performance.
Frame Rate Interpolation
Frame rate interpolation forms the technical backbone of Smart Smoothing’s performance gains.
You’ll render frames at half the original rate while maintaining a perceived 90 FPS experience through intelligent frame prediction and insertion.
This approach delivers three key advantages:
- Reduced GPU utilization – Your graphics card operates at approximately 50% capacity, freeing resources for higher quality settings
- Eliminated frame drops – Interpolated frames create consistent visual flow during demanding VR sequences
- Enhanced graphic fidelity – You can push texture quality, shadows, and effects higher without performance penalties
Smart Smoothing analyzes motion vectors between rendered frames, generating intermediate frames that smooth visual shifts.
While you might notice occasional ghosting with rapidly moving objects, recent improvements have greatly minimized this artifact, making the technology particularly effective in racing simulations.
Ghosting Artifact Management
Although Smart Smoothing delivers impressive performance gains, ghosting artifacts can compromise your VR experience when the interpolation algorithm struggles with rapid object movement.
You’ll notice these artifacts most prominently during fast-paced gameplay, where objects leave visual trails that break immersion.
Your sensitivity to ghosting varies individually, affecting whether you’ll prefer full frame rates over reprojection benefits.
Racing and flight sims typically handle Smart Smoothing better than FPS games, where ghosting becomes more distracting during quick movements.
Current versions have markedly improved artifact reduction through continuous development and user feedback.
You can minimize ghosting by using game-specific profiles that optimize interpolation settings for different genres.
While some artifacts may persist, the 50% GPU reduction often outweighs minor visual compromises for most users.
Optimizing VR Settings for Mid-Range Graphics Cards
Since mid-range graphics cards like the RTX 2060 Max-Q often struggle with VR’s demanding requirements, you’ll need strategic optimizations to achieve smooth gameplay without sacrificing visual quality entirely.
FOV adjustments can deliver remarkable performance enhancements, boosting frame rates by 40-100% on mid-range graphics cards.
Here’s your optimization roadmap:
- Reduce FOV using Oculus debug tools – Set the Tangent multiplier to 0.7 for effective FOV reduction while preserving peripheral vision.
- Lower Terrain Level of Detail to 40% – Combine this with FOV adjustments for maximum FPS improvement.
- Target stable 45+ FPS – This sweet spot guarantees smooth VR experience on mid-range hardware.
These tweaks can transform unplayable experiences into stable 36+ FPS gaming sessions, proving that smart settings matter more than raw GPU power.
Troubleshooting Common FOV Adjustment Issues
You’ve adjusted your FOV settings, but now you’re dealing with annoying black bars cluttering your screen or your custom resolutions aren’t showing up in the game’s graphics menu.
These issues can quickly turn your optimized gaming experience into a frustrating troubleshooting session.
Let’s tackle the most common problems you’ll encounter and get your display looking perfect.
Black Bars Fix
When black bars appear at the top and bottom of your screen after adjusting FOV settings, you’re dealing with an aspect ratio mismatch that’s forcing your display into letterbox mode.
These black borders occur when your monitor doesn’t support the custom resolution you’ve selected, leaving you frustrated after tweaking settings last night.
Here’s how to fix it:
- Customize your resolution to match a 21:9 aspect ratio, such as 1920×810, which eliminates letterboxing while maintaining your desired FOV.
- Enable Full-Screen mode in game settings to prevent windowed display issues that create persistent black bars.
- Adjust GPU scaling settings in Windows to force the game to utilize your entire screen real estate.
If custom resolutions don’t appear, restart your GPU or update drivers.
Resolution Detection Problems
Custom resolution changes don’t always register properly in your system, creating detection problems that prevent games from recognizing your new FOV settings.
You’ll often find that despite setting a much wider resolution in Windows, games won’t display it in their graphics options menu. This happens because the display changes haven’t been properly registered by your system.
First, restart your computer after applying custom resolutions. This forces Windows to refresh its display database.
If that doesn’t work, update your GPU drivers through Device Manager or by downloading the latest version from Nvidia or AMD’s website.
Sometimes older drivers can’t handle newer resolution configurations properly, blocking detection entirely.
Hardware Specifications for Optimal Performance
Although FOV optimization techniques can work wonders, they’ll only take you so far if your hardware isn’t up to the task. You need the right foundation to make FOV adjustments truly effective.
Here are the key hardware specifications that’ll maximize your VR performance:
- CPU and GPU Combo: Pair a powerful AMD Ryzen 9 3900X with an AMD Sapphire Nitro+ 5700XT (8GB) for best results, though mid-range cards like the 2060 Max-Q can still deliver 45+ FPS with proper FOV reduction to 0.7x.
- RAM Capacity: Install 64GB of RAM to handle intensive multitasking and enhance overall system performance during demanding VR experiences.
- Performance Tools: Use Oculus Tray Tool to fine-tune FOV settings and reduce terrain Level of Detail to 40% for playable 36 FPS without overburdening your GPU.
Balancing Visual Quality With Frame Rate Stability
After securing the right hardware foundation, you’ll face the crucial decision of where to compromise between stunning visuals and smooth performance.
Reducing your FOV to 0.7x delivers 40-100% FPS gains, letting you achieve stable 45+ FPS while preserving immersive peripheral vision. You can leverage Oculus debug tools to fine-tune FOV settings, preventing unnecessary pixel rendering without sacrificing visual quality.
Strategic FOV reduction to 0.7x can dramatically boost frame rates by 40-100% while maintaining essential peripheral vision for immersion.
Smart Smoothing technology cuts GPU usage to 50%, enabling higher graphics settings while maintaining perceived 90 FPS.
Consider balancing FOV with render scaling—achieving 38 FPS at 140% render scaling creates an ideal sweet spot. This approach maximizes visual fidelity while ensuring frame rate stability.
You’ll discover that strategic FOV adjustments often provide better overall experience than maxing out all settings.
Community-Tested Settings and Configurations
When you’re ready to implement proven optimization strategies, the VR community has extensively tested specific configurations that deliver consistent results across various hardware setups.
You’ll achieve stable 45+ FPS on mid-range hardware like the RTX 2060 Max-Q and Quest 2 by following these community-validated settings:
- Set FOV reduction to 0.7x using the Tangent multiplier in Oculus debug tools to maintain peripheral vision while boosting performance.
- Reduce Terrain Level of Detail to 40% for significant FPS improvements without major visual sacrifices.
- Use Oculus Tray Tool (OTT) and WithDSS to save persistent settings that remain active with the Oculus service.
Users report minor gauge clarity issues but overwhelmingly express satisfaction with the smoother VR experience these optimizations provide.
Advanced Scaling Options and Display Adjustments
Building on these community-proven configurations, you can push optimization further through advanced scaling techniques that target your specific display setup.
Custom Resolution Utility (CRU) becomes your primary tool for implementing wider FOVs on 21:9 aspect ratio monitors without sacrificing display quality. You’ll create custom resolutions that match your hardware’s capabilities while maintaining visual fidelity.
Smart Smoothing technology offers another powerful approach, reducing your GPU load to approximately 50% while preserving the perceived 90 FPS experience. This reduction allows you to enhance graphics quality without overwhelming your system.
For VR users, Oculus debug tools provide precise FOV control that maintains immersive peripheral vision while delivering those essential performance gains. These scaling methods work synergistically with the 0.7x FOV reduction to maximize your optimization results.
Future Optimization Techniques and Developments
As VR technology evolves, Fixed Foveated Rendering emerges as the most promising technique on the horizon, targeting substantial performance gains for users running lower-end GPUs. This technology reduces your graphics card’s workload while preserving visual fidelity in your central viewing area.
The VR community continues driving optimization forward through:
- Collaborative Settings Discovery – Users share effective tweaks like reducing FOV to 0.7x, with reports showing frame rates exceeding 45 FPS on mid-range hardware.
- Enhanced Tool Integration – Utilities like Oculus Tray Tool become more sophisticated, offering deeper customization options.
- Community-Driven Feedback Loops – Collective user experiences guide developers toward targeted performance improvements.
You’ll benefit from ongoing discussions that fine-tune the balance between visual quality and frame rates, ensuring smoother VR experiences without significant immersion loss.
Fine-Tuning Graphics Settings for Maximum Efficiency
While community innovations point toward an exciting future, you can achieve dramatic performance gains today by strategically adjusting your current graphics settings.
Start by reducing your FOV to 0.7x using Oculus Tray Tool’s Mirror FOV Multiplier and Tangent Multiplier settings—this single change delivers 40-100% FPS increases, enabling mid-range GPUs like the 2060 Max-Q to maintain stable 45+ FPS.
Reducing FOV to 0.7x through Oculus Tray Tool can double your frame rates, making mid-range GPUs VR-capable.
Lower your Terrain Level of Detail to 40% for significant performance boosts without major visual compromises.
Enable Smart Smoothing to cut GPU usage to 50% while maintaining perceived 90 FPS, freeing headroom for higher quality settings.
Fine-tune your Render Scaling to 140% for ideal balance—you’ll hit approximately 38 FPS while maximizing visual fidelity without overwhelming your hardware.
Frequently Asked Questions
What’s a Good FOV for FPS Games?
You’ll want to set your FOV between 75-90 degrees for FPS games. This range gives you the best balance of immersion and visibility while keeping your GPU performance stable and smooth.
How to Increase Graphic Quality?
You can increase graphic quality by reducing FOV to 0.7x, lowering terrain detail to 40%, and using Smart Smoothing. These adjustments free up GPU resources for enhanced textures and effects.
Does the Silent Hill 2 Remake Have a FOV Slider?
No, Silent Hill 2 Remake doesn’t include a FOV slider. You’re stuck with the fixed field of view settings, which has disappointed many players who want to customize their viewing experience for better comfort and immersion.
Does FOV Matter in COD?
FOV absolutely matters in COD. You’ll gain essential peripheral vision for spotting enemies faster, improve your reaction times, and reduce camera adjustments during intense firefights, giving you a competitive edge.


Leave a Reply