Position your motion controllers at shoulder height and establish a 6-foot diameter play area with at least 8-foot ceiling clearance for unrestricted arm movement. Stand with feet shoulder-width apart, shoulders relaxed and squared above your hips, while maintaining a firm yet comfortable controller grip. Calibrate sensitivity settings low enough to capture subtle motions but high enough to filter unintentional movements, then place your tracking camera at eye level, angled slightly downward. Master these fundamentals to access seamless locomotion techniques.
Understanding Natural Arm Movement Physics in VR Environments
Your brain expects your arms to move with the same rhythmic precision they demonstrate during real-world locomotion. When you enter VR environments, natural arm movement becomes essential for maintaining spatial awareness and enabling intuitive interaction.
The physics underlying arm swing relies on coordinated shoulder rotation and elbow flexion, creating a pendulum motion that your nervous system recognizes as familiar. Accurate tracking systems must capture these biomechanical subtleties to prevent disorientation.
Without proper implementation, you’ll experience cognitive load that disrupts immersion. Haptic feedback enhances this experience by simulating physical sensations your body anticipates during movement.
Well-designed VR interfaces leverage these principles, allowing your natural gait patterns to drive navigation. Understanding these fundamentals helps you optimize arm-swing systems for fluid, realistic virtual locomotion.
Calibrating Motion Controllers for Optimal Swing Detection
You’ll need to position your motion controllers at shoulder height to match your natural arm swing arc for accurate detection.
Set your movement thresholds low enough to catch subtle arm motions but high enough to filter out unintentional hand movements.
These two calibration steps form the foundation for responsive arm-swing navigation that won’t frustrate you with missed gestures or false triggers.
Sensor Positioning Requirements
When optimizing arm-swing navigation, proper sensor positioning forms the foundation of accurate motion detection. Position your motion controllers securely just above each elbow to accurately capture the full range of arm movement during swings. This strategic placement guarantees thorough tracking while maintaining stability throughout your motions.
Maintain a clear line of sight between sensors and your tracking device to prevent interference that degrades accuracy. Before use, calibrate the sensors by performing complete swing motions, allowing the system to establish baseline movement patterns and adapt to your individual style.
Don’t forget to adjust sensitivity settings in your software to match your swing speed and technique. This customization enables effective tracking of both rapid strikes and gradual movements, optimizing overall performance for your specific navigation needs.
Movement Threshold Settings
Since motion controllers rely on movement threshold settings to distinguish intentional swings from accidental gestures, you’ll need to fine-tune these parameters for peak detection accuracy.
Start by adjusting sensitivity levels to match your natural arm swing range during practice sessions. Test different configurations to find what works best for your specific movements.
Lowering the threshold increases responsiveness but risks unintended detections from minor movements. You’ll want to strike the right balance between sensitivity and stability. Higher settings reduce false triggers but might miss subtle swings.
Make recalibrating movement thresholds a regular habit, especially after technique changes or physical condition shifts. This guarantees swing detection maintains top-notch performance.
Proper calibration directly impacts accurate tracking, so invest time in finding your ideal settings through systematic testing.
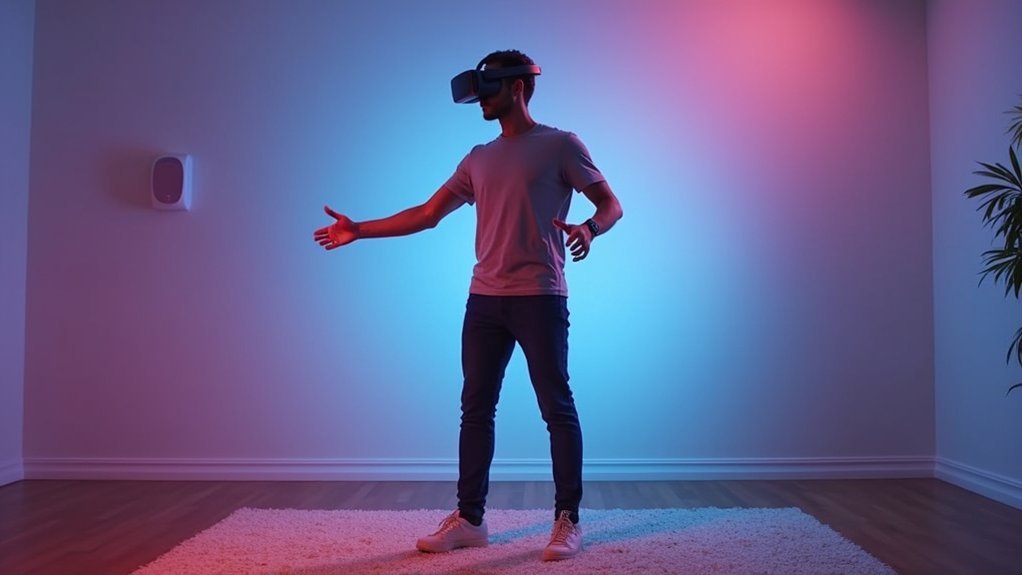
Setting Up Room-Scale Boundaries for Safe Arm Movement

You’ll need to measure your physical space requirements by marking at least 6 feet of diameter around your designated area to guarantee unrestricted arm movement.
Install visual safety boundary markers like tape or cones to clearly outline your safe zone and prevent collisions with furniture or walls.
Don’t forget to verify you’ve got at least 8 feet of ceiling height and a clutter-free floor surface before you start your arm-swing navigation activities.
Measuring Physical Space Requirements
Three essential measurements determine whether your space can safely accommodate arm-swing navigation. You’ll need a minimum space of 6-8 feet in all directions for full arm swings, requiring careful measurement from your center position to walls and furniture.
| Measurement | Minimum Requirement | Purpose |
|---|---|---|
| Horizontal Space | 6-8 feet radius | Safe arm movement |
| Ceiling Height | 8-10 feet | Overhead clearance |
| Floor Area | 12×12 feet minimum | Complete motion range |
Start by measuring your ceiling height to guarantee adequate vertical clearance. Next, map out horizontal distances using a tape measure, marking potential obstacles. Remove obstacles within your measured boundaries to establish clear boundaries for safe arm-swing navigation. Regularly assess space dimensions as room configurations change, maintaining these measurements for peak safety.
Installing Safety Boundary Markers
After establishing your space measurements, creating visible safety boundary markers becomes your next priority for preventing accidents during arm-swing navigation.
Use brightly colored tape or foam markers to outline your designated walking area on the floor, ensuring they’re easily visible during movement. Install vertical markers like cones or poles at corners to provide physical reference points for unrestricted navigation.
Remove all furniture and obstructions from within your boundaries to prevent collisions that could disrupt your arm movement patterns. Your safety boundary markers should create enough space for full arm extension without hitting objects or walls.
Remember to regularly check and adjust boundary markers as needed, accommodating any environmental changes or increased activity levels to maintain continuous safe navigation throughout your sessions.
Configuring Sensitivity Settings for Precise Motion Tracking
Proper sensitivity configuration forms the foundation of effective arm-swing navigation, directly impacting how accurately your device captures and interprets your natural movements. Start by adjusting your sensitivity settings to capture arm movements without excessive noise or false positives. Fine-tune range parameters to match your natural swing patterns, enhancing tracking precision considerably.
| Setting Level | Response Time | User Experience |
|---|---|---|
| Too Low | Delayed | Frustrating |
| Ideal | Instant | Empowering |
| Too High | Erratic | Overwhelming |
Implement a calibration routine before each session, testing your arm swing range against current physical capabilities. Use visual feedback to monitor responsiveness during setup, making real-time adjustments as needed. Regularly review performance data to maintain accuracy as your technique evolves, ensuring consistent motion tracking excellence.
Establishing Proper Stance and Posture for VR Gaming
Your shoulder alignment forms the foundation of effective arm-swing navigation, directly impacting how accurately your movements translate into virtual motion.
You’ll need to position your shoulders squarely above your hips while keeping them relaxed and naturally dropped to create an ideal starting point for arm movements.
Once you’ve established this alignment, focus on finding your balance point by distributing your weight evenly between both feet with that shoulder-width stance.
Shoulder Alignment Fundamentals
When you’re diving into VR gaming, establishing a neutral shoulder setup (NSS) forms the foundation for both peak performance and injury prevention.
Proper shoulder alignment keeps your scapula flat against your ribs, optimizing shoulder joint function for smooth, controlled movements. Maintaining good posture positions your humerus head correctly, maximizing muscle engagement and boosting arm speed during gameplay.
You’ll want to regularly check your shoulder position throughout extended sessions. This prevents discomfort while ensuring balanced muscle activation.
When your shoulders drift forward or elevate, you’re compromising both performance and safety.
Strengthen your shoulder and scapular muscles between gaming sessions. These exercises build endurance and create a protective foundation against repetitive strain injuries that commonly affect VR enthusiasts during prolonged play.
Balance Point Setup
Building on your solid shoulder foundation, balance point setup becomes your next priority for maximizing VR performance.
Position your feet shoulder-width apart to create a stable base that supports effective arm swing navigation. Keep your knees slightly bent with weight distribution evenly balanced between both feet—this prevents fatigue during extended sessions.
Align your hips, shoulder, and head in a straight line to enhance posture and improve your movement mechanics. Maintain a neutral grip on controllers while keeping your arms relaxed and elbows slightly bent. This positioning facilitates smooth, natural movements without shoulder strain.
Your stability depends on this foundation, so regularly adjust your stance based on in-game feedback to maintain ideal balance and prevent discomfort.
Adjusting Controller Grip Techniques for Enhanced Control
Since precise arm-swing navigation depends heavily on how you hold your controller, mastering proper grip techniques becomes vital for achieving fluid, accurate movement. Your controller grip directly impacts control precision, so maintain a firm yet relaxed hold that prevents excessive tension.
Position your thumb and index finger strategically to create a stable foundation while enabling rapid access to important buttons without straining your hands. Experiment with different grip styles like claw grip or palm grip to discover what works best for your navigation techniques.
Adjust finger positioning to cover critical buttons efficiently, minimizing hand fatigue during extended sessions. Regular practice with your chosen grip develops muscle memory, markedly improving your responsiveness and accuracy in arm-swing movements throughout gameplay.
Fine-Tuning Haptic Feedback for Realistic Swing Responses
While proper controller grip establishes your foundation, configuring haptic feedback transforms your arm-swing navigation from basic movement into an immersive, tactile experience that mirrors real-world swing dynamics.
Fine-tuning these realistic swing responses creates tactile sensations that guide your technique development through immediate sensory feedback.
Enhancing user experience requires strategic haptic calibration:
- Adjust intensity and frequency to detect subtle changes in swing performance, enabling precise movement corrections
- Configure customizable feedback settings to match your individual preferences and skill level
- Utilize advanced vibration patterns to distinguish between ideal and suboptimal swings instantly
These targeted adjustments boost engagement and motivation during practice sessions.
Research shows properly tuned haptic feedback leads to improved retention of swing techniques, with users reporting increased confidence in their execution over time.
Optimizing Tracking Camera Placement for Full Range Motion
After perfecting your haptic feedback settings, proper tracking camera placement becomes the cornerstone of accurate motion capture that guarantees every subtle arm movement translates seamlessly into your virtual environment.
Position your tracking camera at eye level, 10-15 feet from your position to capture complete arm motion without distortion. Angle it slightly downward to optimize visibility of the arm swing while maintaining full body view. Use a wide-angle lens when available—it accommodates lateral movements during swing activities.
Optimal camera positioning at eye level, 10-15 feet away with downward angling ensures distortion-free motion capture and comprehensive movement tracking.
Pay attention to lighting conditions and avoid backlighting, as proper illumination enhances motion tracking accuracy and reduces blur.
Test your camera placement regularly during practice sessions, making adjustments to confirm consistent tracking throughout various movements.
Customizing Movement Speed and Acceleration Parameters
Once your tracking cameras capture every nuance of your arm movement, you’ll need to fine-tune the speed and acceleration parameters that control how your physical motions translate into virtual movement.
Customizing movement speed and acceleration parameters requires you to assess your current swing mechanics and identify improvement opportunities. Focus on how arm swing coordinates with body rotation to improve swing metrics like Path and Smash Factor.
- Implement retraining techniques that emphasize rapid adaptation to new movement patterns, ensuring speed changes align with enhanced performance metrics.
- Utilize tools such as resistance bands and specialized trainers to strengthen arm swing muscles, helping you increase both speed and control during acceleration phases.
- Monitor practice conditions including hydration levels while you track your progress through recorded swing data for continuous refinement.
Troubleshooting Common Tracking Issues and Solutions
Even with perfectly calibrated speed and acceleration settings, you’ll encounter tracking inconsistencies that can disrupt your virtual navigation experience.
The most common culprit is tight shoulder muscles that restrict your arm swing mechanics, preventing natural movement flow. When shoulders clamp up, you’ll lose tracking accuracy and create jerky motions.
Start troubleshooting by checking your scapular alignment—improper positioning throws off your entire swing pattern.
Practice hand squeeze techniques to regain control over arm movement, ensuring your grip remains relaxed yet stable. Pay attention to torso rotation during swings, as excessive twisting can confuse sensors and degrade tracking performance.
Regular flexibility exercises for shoulder muscles will restore your natural arm swing rhythm, eliminating most tracking errors and improving overall navigation responsiveness.
Frequently Asked Questions
How to Get Better Arm Swing?
You’ll improve your arm swing by keeping it relaxed and powerful from your shoulder. Maintain straight arms with soft elbows, practice hand squeezes, incorporate full body rotation, and stretch your chest muscles regularly.
How to Get Faster Arm Swing Volleyball?
You’ll increase arm swing speed by engaging your entire body rotation, practicing scap load technique, and strengthening scapular muscles. Focus on proper acceleration and deceleration mechanics while maintaining neutral shoulder positioning.
How to Increase Arm Speed in Golf Swing?
Practice steepening drills daily to improve your arm swing mechanics. Strengthen shoulder muscles through targeted exercises while monitoring Path and Smash Factor metrics. Use visual feedback during training sessions to guarantee you’re maintaining ideal swing positions throughout.
How to Do Arm Swings Step by Step?
Stand with feet shoulder-width apart. Raise straight arms forward while keeping shoulders relaxed. Swing arms back in controlled motion. Squeeze hands during forward swing, then release during backward swing. Practice with torso rotation.


Leave a Reply