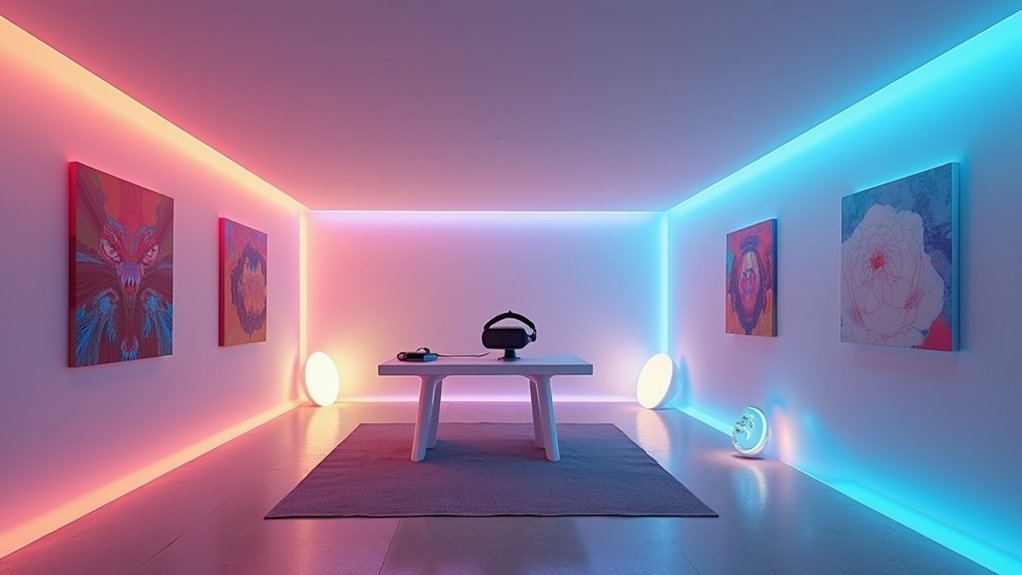
You’ll transform your space into a fascinating immersive environment by implementing a strategic room-scale lighting setup that synchronizes ambient, task, and accent lighting with your VR experiences. Start with addressable LED strips around your room’s perimeter for even distribution, then add focused accent lights to highlight key features like your headset and controllers. Install smart controls with dimmer switches to customize brightness levels, and integrate motion tracking sensors that trigger real-time lighting adjustments based on your movements. The following thorough guide reveals advanced techniques for creating truly dynamic environments.
Essential Lighting Components for Room-Scale VR Systems
Three key lighting components form the foundation of an effective room-scale VR setup: ambient lighting, accent lighting, and smart controls.
Your ambient lighting provides the base illumination throughout your VR space, reducing eye strain during extended sessions while maintaining comfortable visibility. You’ll want to position LED strip lights strategically around your room’s perimeter to create even distribution without harsh shadows or glares that could disrupt your immersion.
Accent lighting serves a different purpose—it highlights specific features like your headset, controllers, or play boundaries. These focused lights create visual focal points that enhance engagement and help orient you within the physical space.
Smart lighting controls tie everything together, giving you adjustable brightness and color-changing capabilities. You can customize atmospheres for different VR experiences, creating dynamic environments that respond to your gameplay.
Addressable LED Strip Selection and Specifications
While standard LED strips provide basic illumination, addressable LED strips reveal dynamic lighting possibilities that transform your VR environment into a truly responsive ecosystem.
These strips enable individual LED control, creating seamless color shifts and immersive effects that standard strips can’t achieve.
When selecting addressable LED strips, you’ll need to evaluate these critical specifications:
- Pixel density – Higher LEDs per meter deliver smoother color shifts and more detailed effects
- Strip type – WS2812B offers simplicity while APA102 provides superior color accuracy and refresh rates
- Power requirements – Calculate 5V per LED with 20% overhead capacity for your power supply
- Control integration – Raspberry Pi or Arduino compatibility enables advanced programming and sound-reactive synchronization
These factors determine your system’s visual impact and performance capabilities.
Advanced Control Systems for Synchronized Lighting
You’ll need sophisticated control systems that go beyond basic on/off switches to orchestrate your room-scale lighting effectively.
Wireless control integration lets you manage your entire setup from mobile devices or dedicated controllers, while real-time audio synchronization creates dynamic light shows that respond to music and sound effects.
Multi-zone management systems give you granular control over different areas of your room, allowing you to create distinct lighting environments that work together seamlessly.
Wireless Control Integration Options
How can you transform a collection of individual lights into a perfectly synchronized lighting ecosystem? Wireless control integration makes this possible by connecting multiple lighting sources through advanced protocols and smart technologies.
Modern wireless control integration options give you unprecedented flexibility in managing your room-scale lighting setup:
- DMX and Wi-Fi Solutions – Control color, intensity, and effects in real-time for dynamic environmental changes.
- Voice Control Compatibility – Command your entire lighting system through Alexa or Google Assistant effortlessly.
- Mobile App Integration – Customize lighting scenes and schedules remotely for personalized gaming or event ambiance.
- Zigbee/Z-Wave Protocols – Guarantee reliable connectivity and prompt response across all fixtures.
These integration methods create seamless shifts and coordination, delivering truly immersive experiences.
Real-Time Audio Synchronization
When your lighting system responds instantly to every beat, bass drop, and audio nuance, you’re experiencing the pinnacle of immersive environmental control.
Real-time audio synchronization transforms your space into a dynamic canvas that breathes with your music.
Your setup needs sound-reactive technology—microphones or sensors that capture audio input and translate it into lighting commands.
These systems analyze frequencies in real-time, triggering color changes, brightness adjustments, and effects that match each musical element.
For maximum impact, integrate spatial audio capabilities.
This creates a 360-degree sound environment where lighting responds to directional audio sources.
You’ll customize color palettes, brightness levels, and alteration effects to match specific audio cues.
Advanced software platforms provide precise audio analysis, enabling complex lighting sequences that elevate your immersive experience beyond basic reactive patterns.
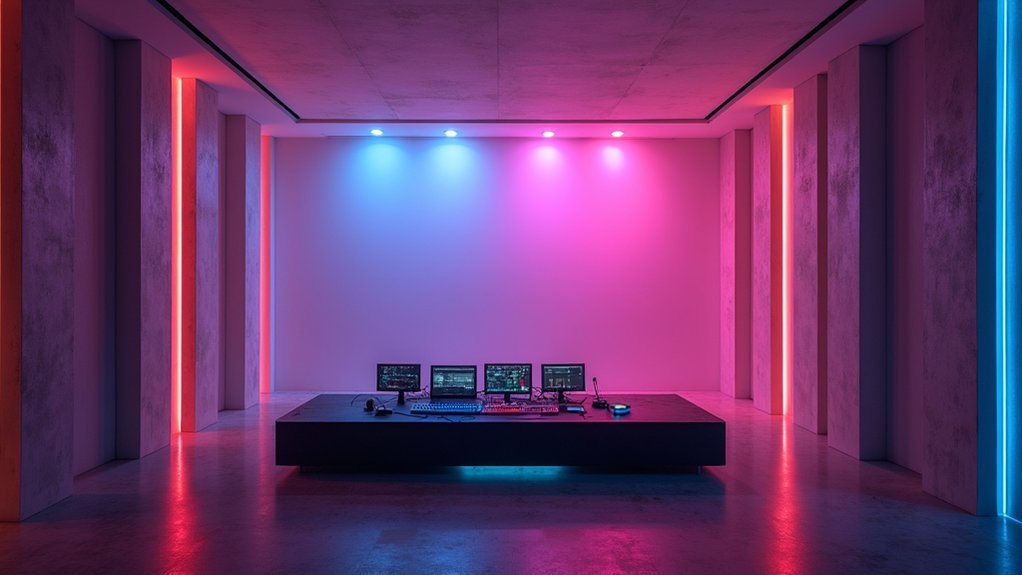
Multi-Zone Management Systems
Advanced multi-zone management systems divide your room into distinct lighting territories, each operating independently while maintaining perfect synchronization with your overall design.
These sophisticated systems transform your space into a truly immersive environment by coordinating ambient, accent, and task lighting seamlessly.
You’ll gain unprecedented control through these key capabilities:
- Smart Integration – Control zones via mobile apps or voice commands for instant adjustments
- Automated Response – Sensors detect occupancy and ambient light, optimizing illumination automatically
- Dynamic Color Control – Color-changing LEDs adapt instantly to match themes or events
- Precision Targeting – Each zone responds to specific activities or moods independently
Multi-zone management systems guarantee you’re not just lighting a room—you’re crafting experiences that adapt intelligently to your needs while maximizing energy efficiency.
Strategic Placement of Light Fixtures Throughout Your Space
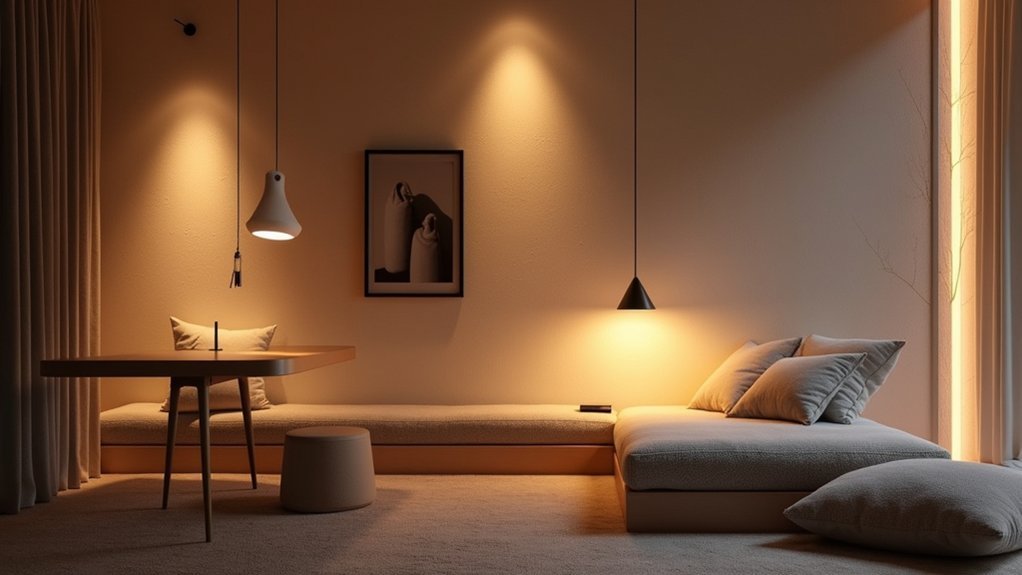
You’ll achieve the most impactful lighting by positioning fixtures at multiple heights and distances throughout your gaming space.
Start with accent lights around key features like memorabilia displays, then add LED strips under shelves for subtle ambient glow, and place floor lamps in corners for balanced illumination.
This layered approach creates depth and visual interest while eliminating harsh shadows that can strain your eyes during extended gaming sessions.
Optimal Fixture Positioning
Since the positioning of your light fixtures determines how effectively they’ll transform your gaming space, understanding strategic placement becomes essential for achieving that ideal immersive atmosphere.
Creating an optimal immersive space requires careful consideration of where you position each lighting element:
- Behind monitors and TVs – Place LED strips to reduce eye strain and create depth perception during extended gaming sessions.
- Under furniture edges – Install accent lighting beneath desks, shelves, and cabinets for subtle ambient glowing effects.
- Room corners – Position floor lamps to eliminate dark zones and provide balanced illumination throughout your space.
- Wall-mounted fixtures – Mount colored bulbs at varying heights to create layered lighting that highlights key gaming setup features.
Experiment with different intensities and colors to find the ideal balance that enhances your overall gaming experience.
Layered Lighting Techniques
Three distinct lighting layers work together to transform your gaming room into a professionally designed space that adapts to any activity or mood.
You’ll want to start with ambient lighting using LED strip lights placed under shelves or behind furniture for subtle background illumination.
Next, add task lighting for functional activities like reading game manuals or checking settings.
Finally, incorporate accent lights around your gaming setup to highlight trophies, art pieces, or collectibles that showcase your personality.
These layered lighting techniques create an immersive environment while eliminating harsh shadows.
Install dimmer switches to customize brightness levels based on whether you’re gaming intensely or relaxing.
Smart home technology enhances this setup, letting you adjust lighting scenes through voice commands or mobile apps for ultimate convenience.
Color Temperature Optimization for VR Environments
When designing your VR lighting setup, color temperature becomes a critical factor that directly impacts user comfort and immersion. Your color temperature optimization strategy should align with natural lighting patterns to create believable virtual environments.
Consider these essential temperature ranges for different scenarios:
- Daytime scenes – Use 5000K-6500K (cool daylight) to enhance alertness and focus.
- Evening environments – Apply 2700K-3000K (warm white) to promote relaxation and comfort.
- Dynamic content – Adjust temperature based on displayed content for realistic atmosphere.
- Consistency maintenance – Keep uniform temperature across visual fields to reduce eye strain.
Cooler temperatures boost concentration during active gameplay, while warmer tones create comfortable social spaces.
Cool lighting sharpens focus for intense gaming sessions, while warm hues foster relaxation in virtual social environments.
You’ll maintain better immersion by matching your lighting temperature to the virtual environment’s time of day and intended mood.
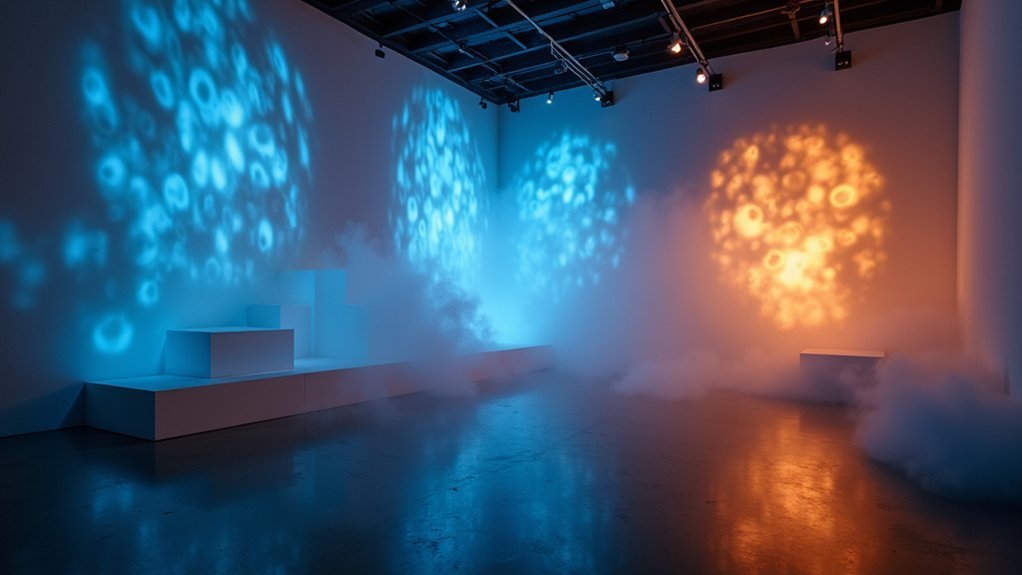
Motion Tracking Integration With Lighting Systems
While traditional static lighting setups provide baseline illumination for VR environments, motion tracking integration transforms your space into a responsive ecosystem that adapts to every gesture and movement.
You’ll achieve this through infrared time-of-flight cameras and 2D LiDAR sensors that precisely track your position, triggering real-time lighting adjustments. When you move closer to virtual objects, your lights can intensify or shift colors, creating deeper emotional connections to the narrative.
Motion tracking integration with lighting systems synchronizes ambient and accent lighting with your actions, delivering seamless shifts that complement visual storytelling.
Whether you’re designing gaming arenas or art installations, this technology personalizes your environment, making every participant’s experience unique and dramatically more engaging.
Software Solutions for Real-Time Light Synchronization
Once you’ve established motion tracking integration, software solutions become the command center that orchestrates your entire lighting ecosystem in real-time.
These platforms enable seamless integration of lighting effects with audio and visual elements, transforming your space into an immersive environment.
Modern real-time light synchronization software offers powerful features:
Real-time synchronization software transforms ordinary lighting into dynamic, responsive environments that react instantly to sound, motion, and user commands.
- Dynamic customization through DMX control software and LED strip apps for colors and patterns
- Advanced protocols like Art-Net or sACN ensuring precise timing between fixtures and control systems
- Sound-reactive capabilities that make lights pulse and respond to music or sound effects
- User-friendly interfaces with drag-and-drop functionality and pre-set scenes for non-technical users
These solutions let you create complex light shows that enhance gaming or event experiences without requiring technical expertise.
Power Requirements and Electrical Safety Considerations
You’ll need to calculate your total wattage requirements by adding up all lighting elements to guarantee your electrical system can handle the load safely.
Proper circuit load distribution prevents overloading individual breakers while maintaining peak performance across your entire setup.
Don’t forget to install ground fault protection devices, which’ll safeguard your equipment and prevent electrical hazards in your room-scale lighting environment.
Calculate Total Wattage Needs
Before installing any lighting fixtures, you must calculate total wattage needs to confirm your electrical system can safely handle the load.
To calculate total wattage needs accurately, follow these essential steps:
- Sum individual fixture wattages – Add up the wattage rating of every bulb, LED strip, and lighting component you’ll use in your room-scale setup.
- Apply the 80% safety rule – Never exceed 80% of your circuit’s capacity; a 15-amp circuit at 120 volts shouldn’t surpass 1,440 watts to prevent overheating.
- Include additional equipment – Factor in power demands from control systems, smart home devices, and any automation hardware that’ll run simultaneously.
- Verify power supply ratings – Confirm your power supplies can handle the total calculated load while maintaining compliance with local electrical codes.
Circuit Load Distribution
After determining your total wattage requirements, you must strategically distribute that electrical load across multiple circuits to prevent dangerous overloads.
Your circuit load distribution strategy should never exceed 80% of each circuit’s capacity—that’s 12 amps for 15-amp circuits and 16 amps for 20-amp circuits.
Spread high-wattage devices like projectors and LED arrays across separate circuits whenever possible. You’ll need to account for inrush current, which can spike considerably higher than running wattage during startup.
Install quality power strips with built-in circuit breakers and surge protection on each circuit.
Use 14-gauge wire for 15-amp loads and verify all connections remain secure. Regularly inspect your wiring for wear, damage, or overheating signs.
Proper circuit load distribution prevents electrical fires and maintains consistent performance throughout your immersive lighting experience.
Ground Fault Protection
Ground fault protection stands as your most critical defense against electrical shock and fire hazards in immersive lighting installations.
This essential safety system detects ground faults and immediately interrupts power supply to prevent dangerous electrical conditions.
You’ll need to implement thorough ground fault protection through:
- GFCI outlets in moisture-prone areas that cut electricity within milliseconds of detecting faults
- Proper voltage and current ratings for all wiring and components to prevent overheating hazards
- Regular equipment inspections to identify wire wear and connection deterioration before they compromise safety
- Surge protectors to shield sensitive lighting equipment from voltage spikes and power surges
Your ground fault protection system guarantees both participant safety and equipment longevity throughout your immersive experience.
Ambient Light Management and Room Darkening Techniques
When you’re setting up a room-scale lighting environment, controlling ambient light becomes your most critical factor for achieving true immersion. Excessive natural light will diminish your projection and LED display effectiveness, so you’ll need spaces with minimal light interference.
Implement blackout curtains or shades to eliminate outside light sources and greatly enhance your visual quality. Consider your room’s acoustic properties when selecting darkening materials, as sound quality can suffer from reflections off bright surfaces.
Blackout curtains eliminate light interference while maintaining acoustic balance for optimal visual and audio performance in immersive environments.
Color match blinds help maintain aesthetic coherence while providing effective light blocking.
You’ll want adjustable lighting solutions like smart bulbs or dimmer switches for precise ambient light management. These tools give you complete control over light levels, ensuring ideal immersion throughout your experience.
Audio-Reactive Lighting for Enhanced Immersion
Beyond controlling your room’s light levels, you can amplify immersion by incorporating audio-reactive lighting that responds to your entertainment’s soundtrack.
Audio-reactive lighting systems like the HyperDrive LED Kit synchronize with sound frequencies, creating dynamic visual experiences that pulse with music and game audio.
This technology transforms your space through several key benefits:
- Real-time synchronization – Lights respond instantly to tempo, volume, and frequency ranges
- Enhanced engagement – You’ll see and feel audio rhythm through vibrant lighting changes
- Reduced eye strain – Visual cues that match audio inputs create a cohesive environment during long sessions
- Customizable atmosphere – Adjust intensity and colors to match your preferences or desired mood
Audio-reactive lighting adds depth to your entertainment experience, making every beat and sound effect visually tangible throughout your room.
Troubleshooting Common Room-Scale Lighting Issues
Even with careful planning, room-scale lighting systems can develop issues that disrupt your immersive experience. Start by checking your power connections—inadequate supply causes flickering or dead lights. Inspect all cables for damage or loose connections that interrupt electricity flow.
| Issue | Cause | Solution |
|---|---|---|
| Flickering lights | Power supply problems | Check connections and wattage |
| Uneven brightness | Poor placement | Reposition lights to reduce shadows |
| Control failures | Outdated firmware | Update smart device software |
Use dimmer switches or smart technology to adjust intensity and prevent overly bright environments. Regular firmware updates keep your lighting setup compatible and functional. Experiment with light placement to eliminate glare and shadows while ensuring even distribution. These steps’ll restore your system’s performance quickly.
Performance Optimization and System Maintenance
After resolving immediate lighting problems, maintaining peak performance requires ongoing attention to your system’s health and efficiency.
Performance enhancement isn’t a one-time task—it’s an ongoing process that guarantees your immersive lighting delivers consistent results.
- Regular maintenance checks – Inspect connections and clean fixtures monthly to prevent performance degradation and extend equipment lifespan.
- Dimmer switch utilization – Adjust lighting intensity to reduce eye strain while creating ideal immersive experiences tailored to your activities.
- Smart home integration – Implement remote control and scheduling features to streamline management and boost energy efficiency.
- Software updates – Keep app-controlled systems like HyperDrive LED Kit current to access new features and performance improvements.
Monitor your power supply’s capacity to confirm it meets all connected devices’ demands, preventing failures and maintaining consistent lighting performance.
Frequently Asked Questions
How to Make a Room Immersive?
You’ll create immersion by layering ambient, accent, and color-changing lights strategically. Install sound-reactive LED systems, use projection mapping on surfaces, and add dimmer controls so you can customize the atmosphere for different activities.
What Is the Best Lighting for Shooting Movies?
You’ll want a three-point lighting setup with key, fill, and backlights. Use soft diffusion materials, maintain proper color temperature, and position lights at 45-degree angles for flattering, cinematic results.
How to Light a Gaming Setup?
Install LED strip lights around your setup’s edges for ambient lighting. Add accent lights to highlight memorabilia. Use dimmer switches for adjustable intensity. Consider sound-reactive options that sync with gameplay audio for maximum immersion.
How Do I Make the Lighting in My Room Better?
You’ll improve your room’s lighting by adding LED strips under shelves, installing dimmer switches for adjustable intensity, using accent lights for highlights, and choosing smart color-changing bulbs for dynamic moods.
In Summary
You’ve now got the knowledge to transform your space into an immersive lighting wonderland. Don’t rush the installation process—take time to properly calibrate each component for peak performance. Remember that room-scale lighting isn’t just about aesthetics; it’s about creating seamless integration between your physical and virtual worlds. With proper maintenance and fine-tuning, you’ll achieve the professional-grade immersive experience you’re after.


Leave a Reply