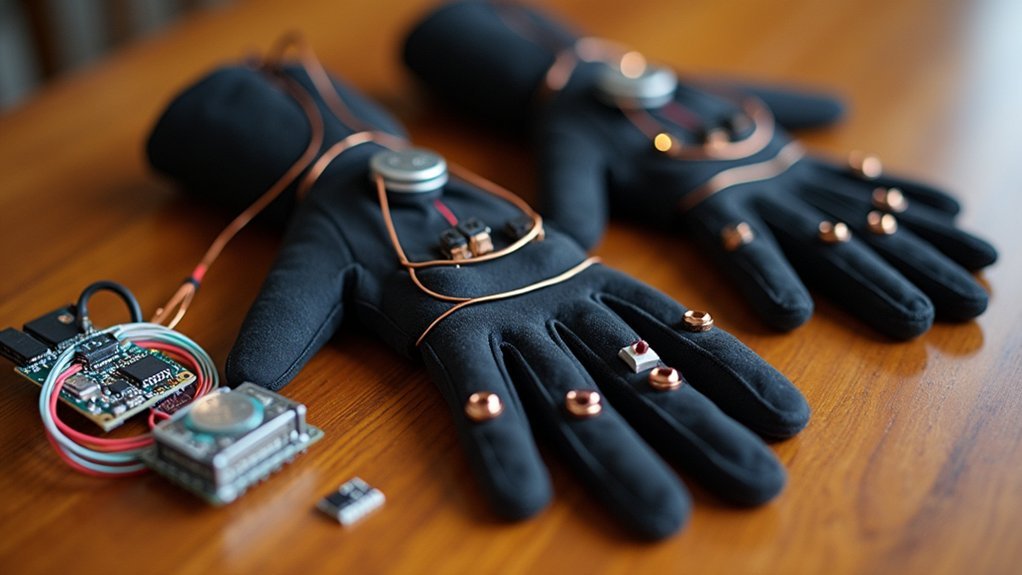
You’ll need ten 10k ohm potentiometers for finger tracking, an Elegoo Nano V3.0 microcontroller for processing, and 9g RC servo motors for force feedback to build functional haptic gloves. Connect everything using a string-based pulley system with spring-loaded spools that attach to each finger. You’ll also need durable base gloves made from neoprene or spandex, plus 3D printed components for mounting hardware. This setup costs around $50 per glove versus $1,000+ for commercial versions, and there’s much more to discover about optimizing performance.
Essential Sensors for Finger Movement Detection
When building DIY haptic gloves, you’ll need ten 10k ohm potentiometers to accurately detect finger movement across both hands. These cost-effective sensors replace expensive flex sensors by measuring rotational position changes.
Ten 10k ohm potentiometers provide cost-effective finger tracking for DIY haptic gloves, replacing expensive flex sensors with reliable rotational position detection.
You’ll attach strings to each finger that connect to the potentiometers, creating a mechanical linkage system for finger tracking. The potentiometers work by detecting rotation caused when you move your fingers, pulling the attached strings.
Spring-loaded spools automatically retract the strings, ensuring smooth operation and consistent tension. This mechanism provides accurate position data throughout your finger’s range of motion.
Your microcontroller, such as an Elegoo Nano V3.0, reads the potentiometer values and converts them into digital finger position data. This approach delivers reliable finger tracking performance while keeping costs considerably lower than commercial alternatives, making haptic feedback accessible for DIY projects.
Microcontroller Boards and Processing Units
After selecting your sensors, you’ll need a reliable microcontroller to process the finger movement data and coordinate haptic feedback responses. The Elegoo Nano V3.0 stands out as an excellent choice for DIY haptic gloves, offering Arduino-compatible functionality in a compact form factor that won’t add bulk to your design.
| Feature | Specification |
|---|---|
| Size | Compact, glove-friendly |
| I/O Pins | Multiple connections available |
| Power | USB-powered with PC integration |
This microcontroller board connects your potentiometers and servos seamlessly, processing finger tracking data while controlling haptic feedback mechanisms. You’ll appreciate its familiar programming environment and real-time data transmission capabilities. The USB power connection eliminates battery concerns while enabling direct communication with your VR-ready PC for responsive gaming experiences.
Actuators for Force Feedback Systems
You’ll need to choose the right actuators to create convincing force feedback that makes virtual objects feel solid and responsive in your hands.
Servo motors offer the most practical solution for DIY builds, but you’ll also want to contemplate solenoid alternatives despite their integration complexities.
Your actuator selection directly impacts both the realism of your haptic experience and the overall cost of your project.
Servo Motor Selection
Since haptic gloves rely on force feedback to create realistic tactile sensations, selecting the right servo motors becomes a critical decision that’ll determine both the quality of your virtual interactions and the overall comfort of wearing the device.
You’ll want to choose servo motors that balance power with size constraints. Inexpensive 9g RC servo motors offer an ideal solution, providing sufficient force to create noticeable resistance when you’re holding virtual objects.
These servos work by pulling back against your hand, simulating the physical sensation of gripping real items. While they’ll increase your project cost to approximately $23 per hand, this investment guarantees your gloves deliver meaningful tactile feedback that enhances immersion in virtual environments.
Solenoid Integration Challenges
While servo motors excel at providing resistance-based feedback, solenoids present a different set of actuator challenges that can make or break your haptic glove project.
Solenoid actuators can simulate object textures and impacts effectively, but their physical size often conflicts with comfortable glove design. You’ll face tough decisions between feedback quality and wearability.
Power management becomes critical since solenoids demand significant current for meaningful force output, adding unwanted weight from larger batteries.
Control complexity increases too—you’ll need sophisticated hand closure detection systems that can complicate your glove’s overall usability.
Performance limitations frequently disappoint builders when solenoids lack sufficient strength or response speed.
Success requires carefully balancing effective tactile feedback against size constraints, power requirements, and user safety considerations during component selection.
String and Pulley Mechanisms
When building your DIY haptic gloves, you’ll need to carefully engineer the string and pulley mechanisms that form the backbone of finger tracking.
The tension control systems must maintain consistent resistance while allowing smooth movement, requiring specific pulley sizes that won’t bind or create excessive friction during operation.
Your spool retraction mechanics need precise spring calibration to automatically return strings to their neutral position without interfering with natural finger movements.
String Tension Control Systems
Although expensive flex sensors often dominate commercial haptic gloves, string tension control systems offer a remarkably elegant alternative that’ll transform how you approach DIY finger tracking.
You’ll attach spools of string to each finger, creating precise movement tracking without costly sensors. The spring-loaded spool mechanism automatically retracts string, maintaining consistent tension for real-time finger movement accuracy.
You’ll guide the string through tiny pulleys that reduce friction and wear while boosting responsiveness. As your fingers move, the string rotates a potentiometer that captures movement data.
This data transmits to your VR-ready PC via USB or Bluetooth, enabling accurate hand representation in virtual environments. String tension control systems minimize costs and simplify construction, making haptic technology accessible for hobbyists.
Pulley Size Requirements
Precision drives every aspect of pulley selection in your DIY haptic glove build. You’ll need pulleys measuring 10-15mm in diameter to maintain comfort without adding bulk to your design. These tiny components work with 10k ohm potentiometers to track finger movement through string tension changes.
| Pulley Diameter | Weight Impact | Performance |
|---|---|---|
| 8-10mm | Minimal | High responsiveness |
| 10-12mm | Low | best balance |
| 12-15mm | Moderate | Good tracking |
| 15mm+ | High | Reduced sensitivity |
Your pulley size requirements directly influence tracking accuracy and user comfort. Choose lightweight materials like aluminum or high-grade plastic to minimize hand fatigue during extended use. The right sizing guarantees proper string tension calibration, making your haptic feedback system responsive and reliable for finger position detection.
Spool Retraction Mechanics
Since finger tracking demands constant string tension, your spool retraction mechanism becomes the heart of responsive haptic feedback.
You’ll need spring-loaded spools that automatically pull strings back as your fingers extend, creating natural resistance that mimics real life tactile experiences. These spool retraction mechanics rely on recycled badge reel components, making your build both cost-effective and reliable.
Your setup requires three critical elements:
- Potentiometer rotation – String movement rotates sensors to track precise finger positions and finger splay
- Spring tension calibration – Balanced force that won’t restrict movement but maintains constant pull
- String routing through pulleys – Smooth guidance prevents tangling while preserving the natural feel
This mechanism eliminates expensive flex sensors while delivering accurate finger tracking through simple mechanical principles.
Potentiometers for Position Tracking
When you’re building DIY haptic gloves, potentiometers serve as the backbone of your finger tracking system by measuring precise changes in resistance as each finger moves through its range of motion.
You’ll need ten 10k ohm potentiometers to track all finger movements accurately. These components connect to spools of string attached to each finger, creating real-time feedback as the string pulls and rotates the potentiometer shaft.
Ten 10k ohm potentiometers with string-attached spools provide precise real-time finger tracking for accurate haptic glove functionality.
The potentiometers transmit movement data directly to your microcontroller, such as the Elegoo Nano V3.0, which processes this information for VR applications.
This setup offers a budget-friendly alternative to expensive flex sensors, making finger tracking technology more accessible. You’ll achieve professional-grade precision without the premium cost, ensuring your DIY haptic gloves deliver reliable virtual interactions.
Servo Motors for Haptic Response
You’ll need servo motors to create the force feedback that makes virtual objects feel real in your hands.
For DIY haptic gloves, inexpensive 9g RC servo motors work perfectly, adding about $23 to your total build cost while delivering precise pullback resistance.
These servos integrate seamlessly with the OpenGloves driver, letting you feel different textures and weights as you interact with virtual environments.
Servo Motor Selection
Four key factors determine the success of your haptic glove’s force feedback system, with servo motor selection standing as the most critical component.
You’ll want to focus on these essential considerations when choosing servo motors for your DIY project:
- Cost-effectiveness – Standard 9g RC servo motors deliver excellent performance at roughly $23 per hand, making them ideal for budget-conscious builders.
- Power requirements – USB battery compatibility guarantees your gloves remain portable while providing sufficient torque for realistic pullback feedback.
- Software integration – OpenGloves drivers enable seamless connection with SteamVR games, maximizing your glove’s compatibility across various virtual environments.
These servo motors simulate object weight and resistance, creating convincing interactions with virtual elements.
Your selection directly impacts the tactile realism you’ll experience during VR sessions.
Force Resistance Implementation
Beyond selecting the right servo motors, implementing effective force resistance requires strategic placement and programming to maximize haptic feedback.
You’ll position multiple servo motors across each glove to pull back against your finger movements, creating realistic sensations when you interact with virtual objects. This force feedback system simulates holding different shapes and weights in VR environments.
The servos connect to USB batteries for power, making your build accessible and portable.
Through OpenGloves driver integration, your force resistance system works seamlessly with SteamVR applications. The strategic programming guarantees each servo responds appropriately to virtual interactions, whether you’re grasping a delicate object or lifting something heavy.
This implementation transforms basic gloves into sophisticated haptic devices for just $23 per hand.
Thermoelectric Devices for Temperature Simulation
When you’re building DIY haptic gloves, thermoelectric devices like Peltier modules offer a compelling way to simulate realistic temperature sensations that correspond to virtual objects you’re touching.
These devices use the Peltier effect to transfer heat from one surface to another when electric current flows through them, giving you precise temperature control.
Here are three key considerations for implementing thermoelectric devices:
- Power and thermal management – You’ll need adequate power supply and heat dissipation to prevent overheating and guarantee safe operation.
- Dual-device setup – Using paired modules lets you create both heating and cooling sensations for complete temperature simulation.
- Design trade-offs – You’ll face limitations in effectiveness that require balancing comfort, functionality, and device capabilities in your glove design.
Base Glove Materials and Fabric Selection
Although temperature simulation adds an important sensory layer to your haptic gloves, the foundation of any successful DIY project starts with selecting the right base glove material.
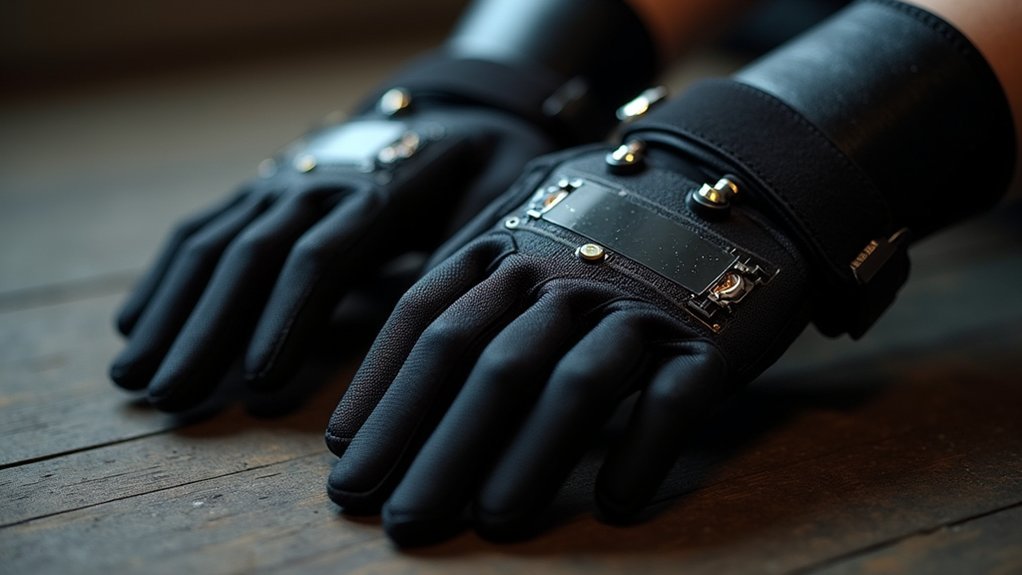
You’ll want to choose durable fabrics like neoprene or spandex that provide flexibility and comfort during extended VR sessions. Soccer goalkeeper gloves work exceptionally well as base glove materials because they’re built for durability and feature reinforced areas perfect for mounting electronic components while maintaining a snug fit.
Lightweight fabric selection is vital since you don’t want unnecessary bulk interfering with your VR interactions.
You can enhance functionality by incorporating 3D printed custom mounts for sensors and actuators. Adding elastic bands or straps helps secure the glove and guarantees proper positioning of haptic components for peak performance.
3D Printed Components and Housing
3D printed components form the structural backbone of your DIY haptic gloves, providing customizable housing that balances durability with lightweight design.
These components guarantee your gloves remain comfortable during extended VR sessions while maintaining the structural integrity needed for consistent performance.
You’ll need several key 3D printed components for your haptic gloves:
- Finger mounts – Secure haptic actuators and sensors to each finger segment
- Housing structures – Accommodate internal wiring and mechanical components safely
- Custom fitting elements – Allow personalized adjustments for different hand sizes
Lucas’s GitHub page provides all necessary files for printing these components yourself.
This accessibility facilitates rapid prototyping and iteration, letting you refine your glove design based on performance testing and user feedback while keeping costs considerably lower than commercial alternatives.
Springs and Retraction Systems
You’ll need reliable springs and retraction systems to keep your haptic glove strings properly tensioned and responsive.
Badge reel components offer an excellent foundation for this system, as they’re readily available and already contain the spring mechanisms you need.
Spring-loaded spool mechanisms automatically retract the strings attached to each finger, creating natural motion while providing the resistance feedback that makes virtual objects feel real.
Badge Reel Components
The heart of your haptic glove’s finger tracking system lies in the badge reel’s spring-loaded mechanism. These compact components deliver precise string retraction while maintaining consistent tension for accurate finger position measurements through potentiometers.
Badge reel components offer three key advantages for your DIY project:
- Automatic retraction – The spring-loaded spool pulls strings back instantly after finger movement, creating seamless virtual reality interactions.
- Consistent tension – Taut strings ensure reliable position tracking without slack that could compromise measurement accuracy.
- Sustainable design – Recycled badge reels reduce project costs while giving discarded items new purpose.
Their lightweight, compact design won’t add bulk to your glove, maintaining comfort during extended use.
The retractable spool mechanism provides the foundation for smooth finger movement tracking essential for effective haptic feedback.
Spring-Loaded Spool Mechanisms
Precision defines every aspect of your spring-loaded spool mechanism, where carefully calibrated tension transforms finger movements into accurate digital signals.
You’ll find that spring-loaded spool mechanisms serve as the backbone of your DIY haptic glove’s retraction system, automatically pulling strings back when you release your fingers. These mechanisms eliminate manual intervention while maintaining seamless finger tracking throughout your VR experience.
Recycled badge reel components offer you a cost-effective foundation for building these essential systems. The spring inside each spool connects to a potentiometer, which your microcontroller reads to translate physical movements into virtual interactions.
You must properly calibrate the spring tension to guarantee peak responsiveness and comfort, as this directly impacts your immersion and control within virtual environments.
Wiring and Electrical Connections
When assembling your DIY haptic gloves, proper wiring forms the backbone that connects all components into a functional system.
You’ll need to establish reliable wiring connections between your 10k ohm potentiometers, 9g RC servo motors, and the Elegoo Nano V3.0 Board to guarantee accurate data transmission and responsive force feedback.
Your electrical setup requires three critical connection types:
- Potentiometer connections – Wire each of the 10 potentiometers to analog input pins on your microcontroller for precise finger position tracking.
- Servo motor connections – Connect all servo motors to designated digital pins while guaranteeing adequate power distribution for force feedback generation.
- Power distribution – Establish stable voltage supply lines to prevent signal interference and maintain consistent component performance throughout operation.
Power Sources and Battery Systems
Once you’ve established your wiring framework, selecting appropriate power sources becomes your next priority for maintaining consistent haptic feedback performance.
USB batteries offer an ideal solution for powering your 9g RC servo motors while keeping the system lightweight and portable. These power sources must effectively support your servo motors and provide compatible input for your Elegoo Nano V3.0 controller board.
USB batteries provide the optimal balance of power efficiency and portability for servo-driven haptic feedback systems.
When choosing batteries, you’ll need to evaluate capacity and life span carefully, as these factors directly impact your VR session duration and overall glove performance.
Integrating proper power sources and additional components will increase your total cost to approximately $23 per hand, but this investment guarantees reliable operation during extended use periods.
Communication Modules for Wireless Connectivity
After securing reliable power for your haptic gloves, you’ll need to establish wireless communication between your devices and VR-ready PC systems. Communication modules featuring Bluetooth technology enable seamless connectivity, allowing real-time data transmission from your gloves to VR platforms without restrictive cables.
Your Elegoo Nano V3.0 board supports the necessary communication protocols for wireless operation. Here’s what you’ll need for effective connectivity:
- Bluetooth modules – Enable wireless data transmission between gloves and PC systems
- Open-source drivers like OpenGloves – Facilitate integration with SteamVR for seamless communication
- USB power pairing with Bluetooth – Maintains wireless setup while ensuring adequate power supply
This wireless approach eliminates cable constraints, providing enhanced freedom of movement within virtual environments while maintaining responsive haptic feedback and accurate tracking performance.
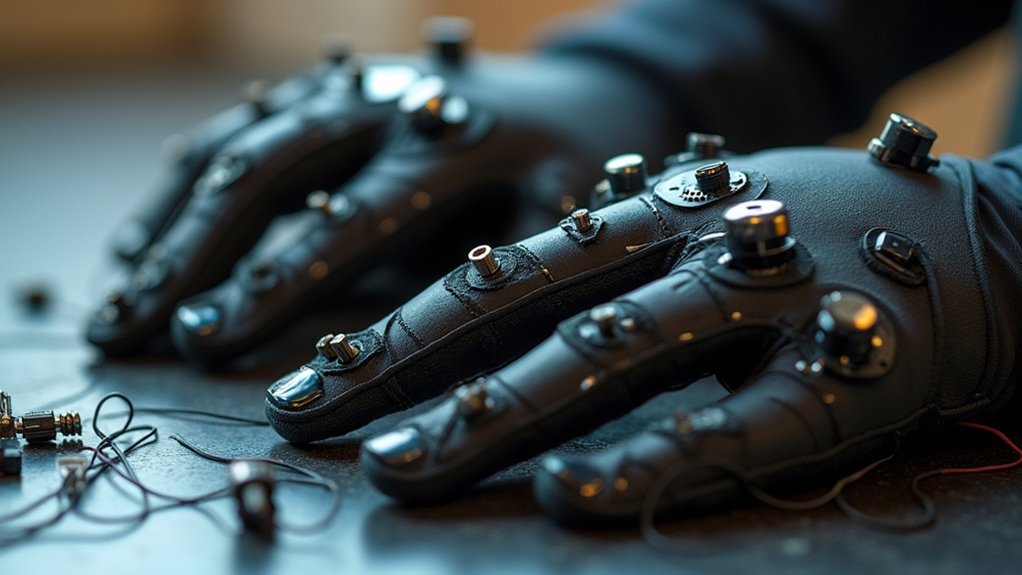
Mounting Hardware and Fasteners
Three critical mounting components form the backbone of your DIY haptic gloves: lightweight pulleys, secure brackets, and adjustable fasteners. These mounting hardware pieces guarantee your glove’s mechanical components move smoothly while maintaining precise finger tracking capabilities.
You’ll need screws, nuts, and bolts to assemble the frame and attach electronic components like servos and potentiometers. The fasteners must create solid connections without adding unnecessary bulk to your design.
For comfortable wear, incorporate Velcro straps or elastic bands that adjust the glove’s fit securely. Prioritize lightweight materials in all mounting hardware selections to minimize overall weight and enhance usability.
Consider using recycled components like badge reel mechanisms for cost-effective mounting solutions. These repurposed parts maintain functionality while reducing your project expenses without compromising performance.
Frequently Asked Questions
How Do Haptic Feedback Gloves Work?
You wear gloves with servomotors that create force feedback when you touch virtual objects. String-based finger tracking measures your movements, transmitting data to your VR system for real-time hand representation and tactile sensations.
How Much Do Haptx Gloves Cost?
HaptX gloves cost approximately $10,000, making them primarily enterprise-focused rather than consumer products. You’ll need significant investment beyond the gloves themselves, including compatible high-end VR systems and professional software.
How Much Do Haptic Gloves Cost?
You’ll find haptic gloves range dramatically in price. DIY versions cost under $50, with basic prototypes around $22-23 per hand. However, commercial haptic gloves like HaptX can cost thousands of dollars for professional-grade systems.
What Are the Best VR Haptic Gloves?
You’ll find LucidVR’s Prototype 4 among the best options, costing just $23 per hand with servo motor force feedback. They’re compact, integrate with SteamVR, and support OpenGloves drivers for customization.
In Summary
You’ll need several key materials to build functional DIY haptic gloves. You’ve got to combine sensors, microcontrollers, actuators, and mechanical components like strings and pulleys. Don’t forget potentiometers for tracking, proper wiring, reliable power sources, and communication modules for wireless features. You’ll also need mounting hardware to hold everything together. With these materials and some technical know-how, you can create haptic gloves that’ll provide realistic force feedback for your projects.


Leave a Reply