To fix Oculus Quest tracking issues fast, make certain your environment has balanced lighting (100-500 lux) without harsh shadows or glare. Cover reflective surfaces like mirrors and windows, and clean camera lenses with a microfiber cloth. Update your headset’s firmware, restart the device, and recalibrate controllers by removing batteries briefly. Create a minimum 2m x 2m play area away from interference sources. These quick fixes tackle most common tracking problems, but deeper solutions await for persistent issues.
Understanding Quest Tracking Technology
Four primary components power the Oculus Quest’s sophisticated tracking system. The headset uses inside-out tracking through built-in cameras that eliminate the need for external sensors while providing 6 Degrees of Freedom (6DoF).
The Quest’s groundbreaking inside-out tracking system delivers full 6DoF movement without external sensors, transforming how we experience VR.
This means your headset tracks both position and orientation in 3D space with millimeter-level precision.
Your controllers feature infrared LEDs that the headset cameras detect and triangulate in real time. Accurate tracking depends on precise LED matching algorithms that map detected blobs to specific LEDs on your controllers. When you move, multiple sensors work together: cameras capture visual data while inertial measurement units (IMUs) track motion independently.
Sophisticated fusion algorithms combine these inputs to guarantee smooth tracking.
Unlike simpler 3DoF systems that only track rotation, Quest’s 6DoF tracking registers when you move forward, backward, up, down, and side-to-side, creating a truly immersive VR experience.
Environmental Lighting Optimization
To optimize tracking on your Quest, you’ll need balanced ambient lighting that’s neither too dim nor excessively bright.
Avoid reflective surfaces and bright spots that create hotspots, as these confuse the headset’s cameras and disrupt positional tracking.
Maintaining consistent, diffuse lighting throughout your play space provides the clear visual reference points your Quest needs for stable tracking performance. The Quest’s tracking system relies on similar principles as frustum culling techniques, determining what’s visible to the cameras for accurate spatial positioning.
Balanced Ambient Light
Achieving ideal tracking performance on your Oculus Quest requires carefully balanced ambient lighting, typically between 100-500 lux.
Too dim (under 80 lux) creates sensor noise, while excessive brightness (above 1000 lux) confuses IR tracking.
Position light sources above and behind you to minimize shadows and guarantee even illumination throughout your play area.
- Nail the sweet spot – Use diffuse lighting like LED panels or shaded lamps rather than harsh spotlights that can blind your Quest’s sensors. Holiday decorations with infrared light clusters can significantly interfere with controller tracking accuracy.
- Banish the flicker – Eliminate fluorescent lights that interfere with sensor integration and cause frustrating tracking jumps.
- Control the chaos – Install blinds to manage changing daylight and disable motion-activated lights that create unpredictable brightness shifts.
Avoid Reflection Hotspots
Reflective surfaces pose a significant threat to your Quest’s tracking performance. Mirrors, windows, glass tables, and polished furniture create misleading light patterns that confuse your headset’s cameras, often triggering those frustrating “Tracking Lost” messages.
Scan your playspace for reflective culprits and cover them with curtains, blinds, or matte films. Rearrange shiny objects outside your guardian boundaries whenever possible.
Position lights to provide soft, diffused illumination rather than harsh direct beams that create glare. Even modern Quest tracking cameras can become oversaturated in environments with excessive brightness.
If tracking issues persist, try restarting your headset to refresh camera calibration or re-pairing your controllers. For stubborn problems, consider updating your headset software—newer tracking algorithms handle reflections better.
Remember to test tracking performance after each environmental modification to identify remaining hotspots.
Eliminating Reflective Surface Interference
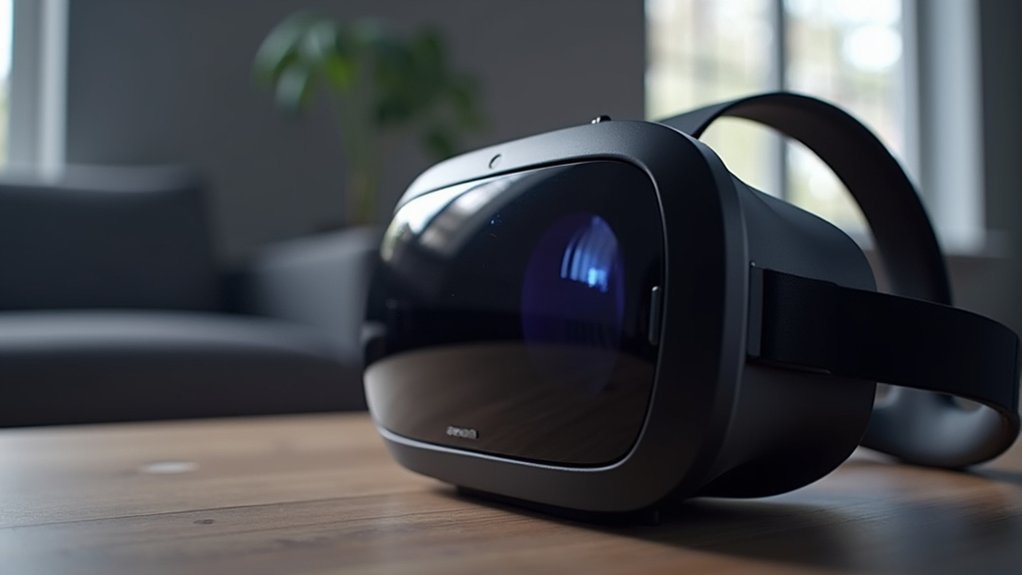
Reflective surfaces can wreak havoc on your Quest’s tracking system, with mirrors creating ghost controller images that confuse your headset’s cameras.
Windows and glass furniture produce similar infrared reflections that trick your Quest into seeing controllers where they aren’t, so cover these surfaces with non-reflective materials during gameplay.
Even shiny décor items and polished floors can disrupt tracking accuracy, so you’ll want to reposition your play area away from these reflective elements or temporarily cover them with matte fabrics. For optimal tracking performance, maintain a well-lit environment while avoiding direct sunlight on your headset or play area.
Mirror Problems Explained
While your Oculus Quest’s tracking system is impressively sophisticated, it can be easily confused by mirrors and other reflective surfaces in your play area.
Mirrors create direct reflections that bounce the headset’s tracking lights back to the cameras, causing the system to detect false spatial data. Your Quest fundamentally “sees” a duplicate play space, leading to jarring visual jitter and controller lag. These tracking issues are often accompanied by center vision glare when focused on dark colors, similar to the experience reported in Vader Immortal.
- Safety Risk – Tracking glitches from mirror reflections can cause sudden position jumps, potentially making you lose balance or hit nearby objects.
- Motion Sickness – The disconnect between your physical movement and what you see in VR can trigger nausea within minutes.
- Immersion Breaking – Nothing ruins VR presence faster than your virtual hands suddenly flying across the room due to reflection interference.
Window Glare Solutions
Windows create another major source of tracking interference for your Quest headset, but fortunately, several effective solutions exist.
Install blackout curtains or heavy drapes to dramatically reduce external light entry, or apply specialized window films that diffuse incoming sunlight.
Position your VR play area away from direct sunlight and windows, and consider using adjustable blinds for dynamic light control during sessions.
For your headset itself, guarantee proper IPD adjustment to reduce internal lens glare and ghosting. Clean your lenses regularly with microfiber cloths to remove smudges that amplify window reflections. Remember that Quest 2 offers three IPD settings (58mm, 63mm, and 68mm) to accommodate different users.
Turn off overhead lights during play and opt for soft, indirect lighting in your VR space.
If possible, schedule your VR sessions during evening hours when outside light intensity naturally decreases.
Shiny Décor Management
Shiny surfaces throughout your home environment can wreak havoc on your Quest’s tracking system, creating persistent issues that disrupt immersion.
Your headset’s cameras misinterpret reflections from mirrors, glass tables, and polished marble as actual controller movements, causing misalignment and tracking loss. Regular camera maintenance ensures these sensors can accurately distinguish between real movement and reflections.
To eliminate these reflective interferences:
- Cover or relocate mirrors and glass surfaces – throw a blanket over that full-length mirror or move it out of your play area entirely to instantly improve tracking accuracy.
- Replace shiny items with matte alternatives – swap out that glossy coffee table for a non-reflective surface to create a VR-friendly environment.
- Apply anti-reflective films to permanent glass fixtures like windows or display cabinets when removal isn’t practical.
Software Updates and Firmware Fixes
Keeping your Oculus Quest firmware up-to-date is essential for maintaining ideal tracking performance. Meta regularly releases updates that improve tracking algorithms, fix bugs, and enhance sensor calibration. Poor lighting conditions can significantly impact your headset’s ability to track properly, so ensure your play area has consistent, moderate lighting.
| Update Type | Benefits |
|---|---|
| Firmware Updates | Improved tracking stability and controller connectivity |
| Guardian System | Enhanced boundary detection and play space recognition |
| Software Patches | Bug fixes for tracking glitches and AR alignment |
| Controller Firmware | Better Bluetooth connectivity and power management |
When facing persistent tracking issues, check for updates in Settings > About. Enable automatic updates through the Meta Quest app for seamless installation. If problems continue after updating, try restarting your headset or recreating your Guardian boundary. For stubborn issues, unpair and re-pair your controllers to refresh their connection with your headset.
Controller Recalibration Methods
Three effective recalibration methods can resolve most Quest controller tracking issues.
Whether you’re experiencing drift or unresponsiveness, properly calibrating your controllers can make gameplay smooth again.
Fixing controller calibration transforms a frustrating VR experience into the smooth, immersive gameplay you deserve.
1. Access hidden calibration tools – Navigate to Settings > Experimental features to find thumbstick range and dead zone options.
Following the on-screen instructions to center the X and Y axes can feel like giving your controllers a fresh start!
2. Reset controller hardware – Remove batteries for a few minutes, then re-pair with your headset.
For Quest Pro, place controllers on the charging dock for 30 seconds – this simple refresh often works wonders!
3. Clean with precision – Use a microfiber cloth around thumbsticks to remove debris causing drift.
For stubborn grime, a light 50/50 isopropyl alcohol solution can restore that crisp controller response.
During calibration, you’ll need to move the thumb stick in circular motions three times at the outer limits for the system to properly determine controller position.
Hand Tracking Troubleshooting
When your Quest’s hand tracking isn’t functioning properly, several common issues might be interfering with its performance.
First, verify it’s enabled in both device settings under “Hands and Controllers” and in the universal menu. Confirm your app actually supports hand tracking and has the latest updates installed.
Environmental factors often cause tracking problems. Maintain consistent, moderate lighting—avoiding both dim conditions and bright sunlight.
Remove mirrors and reflective surfaces that confuse the sensors, and keep camera lenses clean with a microfiber cloth. The tracking system uses camera images to analyze and estimate the position of your hands in real-time.
If problems persist, try toggling hand tracking off and on, or restart your headset completely.
Check for firmware updates that might address tracking bugs. For stubborn issues, test in different environments to determine if it’s a hardware fault before contacting Meta support.
Play Area Setup and Guardian Boundaries
Proper guardian setup forms the foundation of a safe, enjoyable Oculus Quest experience by defining your virtual boundaries in physical space.
Clear a minimum 2m x 2m play area and guarantee you’re in a well-lit environment without direct sunlight or reflective surfaces that can interfere with tracking. The Quest provides room scale mode which requires at least 6.5 x 6.5 feet of clear space for optimal performance.
During setup, use Passthrough to accurately trace your boundaries while pointing at the floor. Don’t forget to set the correct floor height by placing your controller on the ground. If you relocate or rearrange furniture, always update your guardian boundaries.
- Always wear wrist straps to prevent controller damage when you inevitably reach beyond your boundaries.
- Leave buffer space between your guardian and walls to avoid painful collisions.
- Check for new obstacles before each session to protect yourself and your surroundings.
Camera Maintenance for Improved Tracking
Your Oculus Quest’s tracking cameras need regular cleaning to maintain accurate position detection.
Gently wipe the external camera lenses with a dry microfiber cloth using circular motions from center outward, avoiding liquid cleaners that could damage internal components. Using appropriate cleaning methods prevents scratches on the sensitive camera lenses, similar to how you should care for the display lenses.
Inspect the lenses for scratches or physical damage that might interfere with tracking performance, as even minor lens imperfections can greatly degrade your VR experience.
Clean Your Lenses Properly
Maintaining pristine lenses is essential for ideal Quest tracking performance. Your headset’s cameras rely on clear optics to properly detect movement and environmental markers.
Always power off your Quest before cleaning, and use only a dry microfiber cloth designed for optical lenses—never paper towels or chemical cleaners that can scratch the surface and void your warranty. Use a fresh cloth section for each lens to avoid transferring dirt and oils between them.
- Wipe gently in circular motions from the center outward using minimal pressure to preserve delicate lens coatings.
- Clean after every session to prevent oil buildup that can blur your vision and compromise tracking accuracy.
- Don’t forget the external cameras as dust and smudges on these sensors directly impact your headset’s ability to track your movements.
Check for Lens Damage
While regular cleaning keeps your lenses functional, detecting actual damage to your Quest’s cameras represents the next step in resolving tracking issues.
Examine each tracking camera carefully for scratches, cracks, or manufacturing defects that might scatter light or distort imagery.
Damaged lenses directly impact your headset’s ability to detect spatial markers accurately. Even minor scratches can introduce noise into tracking algorithms, causing jittery motion or complete tracking loss.
If you notice lens imperfections, test your headset in different lighting conditions to confirm whether the damage affects performance.
For minor issues, software updates might compensate for optical aberrations. However, significant damage requires professional repair or camera module replacement.
Remember that preventing damage through proper storage and handling remains your best defense against lens-related tracking failures. Quest’s tracking relies primarily on cameras and IMU rather than the depth sensor for basic functionality.
System Restart and Reset Procedures
When tracking issues persist on your Oculus Quest, performing a system restart or reset can often resolve the problem. Start with a soft reset by holding the power button for 30 seconds to force shutdown, then wait 30 seconds before restarting. This force restart method is particularly helpful when the headset becomes completely unresponsive.
For stubborn issues, use power + volume down buttons simultaneously to access the recovery menu.
- Don’t panic! A simple restart fixes most tracking glitches without losing your game progress or settings.
- Feel empowered by trying a soft reset before resorting to factory reset – it’s less drastic and often just as effective.
- Save yourself hours of frustration by fully charging your headset after a forced shutdown to stabilize the system.
If problems continue after restart, consider updating software or checking for compatibility issues.
Resolving Hardware-Related Tracking Issues
Hardware issues often lie at the root of persistent Quest tracking problems, requiring hands-on solutions rather than just software fixes. Check your camera lenses for smudges or scratches and clean them gently with a microfiber cloth. Never use harsh chemicals that could damage lens coatings. Multiple users have reported that Tracking Lost messages frequently indicate hardware failure requiring replacement rather than continued troubleshooting.
If your controllers lose tracking, replace batteries or inspect contacts for corrosion. Try unpairing and re-pairing stubborn controllers to resolve connection issues.
| Issue | Solution | Impact |
|---|---|---|
| Dirty lenses | Clean with microfiber | Immediate improvement |
| Low batteries | Replace batteries | Restores precise tracking |
| Sensor obstruction | Clear play area | Prevents sudden tracking loss |
| Poor lighting | Adjust room lighting | Creates stable environment |
Keep your play area free of reflective surfaces and maintain balanced lighting—not too dim or bright—for ideal camera-based tracking performance.
External Device Interference Reduction
Modern homes filled with wireless technology often create invisible battlefields of competing signals that can wreak havoc on your Quest’s tracking system. Your smart home devices, WiFi networks, and Bluetooth gadgets are all potential culprits disrupting your VR experience.
- Separate your connections – Split devices between 2.4GHz and 5GHz bands, and consider creating a dedicated VR network that won’t compete with your other bandwidth-hungry devices. Many users report that Smart TVs and Xbox experience connection loss when Quest 2 is actively being used.
- Clear the airwaves – Turn off unused Bluetooth devices, move wireless peripherals away from your play area, and eliminate RF interference sources like microwaves or cordless phones.
- Optimize your setup – Connect your PC directly to your router via Ethernet when using Air Link, and strategically position your router for direct line-of-sight to your headset.
Frequently Asked Questions
Will Quest Tracking Work Outdoors or in Direct Sunlight?
No, Quest tracking won’t work in direct sunlight. It can damage your headset permanently. Outdoors, tracking only functions in well-shaded areas with consistent lighting, and even then performance isn’t guaranteed.
Can I Use Quest While Traveling in a Car or Train?
Using Quest in moving vehicles isn’t recommended. You’ll likely experience severe motion sickness since your visual and physical cues conflict. The vehicle’s movement also disrupts tracking, creating a disorienting and uncomfortable experience.
Do VR Covers or Accessories Affect Tracking Performance?
Most VR covers don’t affect tracking unless they’re reflective or obstruct cameras. Properly fitted accessories maintain tracking integrity, but bulky add-ons that block sensors can impair performance. Stick with matte-finished, compatible accessories for best results.
How Does Quest Tracking Compare to PC VR Systems?
Quest’s inside-out tracking is simpler to set up but may be less precise than PC VR’s external sensors. You’ll get portability with Quest, but PC VR offers better tracking in low-light and occlusion scenarios.
Does Battery Level Impact Tracking Quality and Accuracy?
Yes, your battery level can impact tracking. When batteries get very low, controllers may track erratically. Using 1.5V rechargeable batteries or lithium batteries helps maintain stable voltage for ideal tracking performance.
In Summary
You’ve now got the tools to fix your Quest tracking issues fast! Remember, good lighting, clean cameras, and eliminating reflective surfaces solve most problems. Keep your firmware updated, recalibrate controllers when needed, and minimize electronic interference. If tracking issues persist after trying these solutions, contact Oculus support—they’ll help diagnose any potential hardware problems you can’t fix yourself.
Leave a Reply